Step 3
Finishing the code
Now that we have a better understanding of conditions let’s move on to the rest of the code.
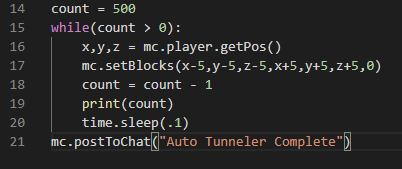
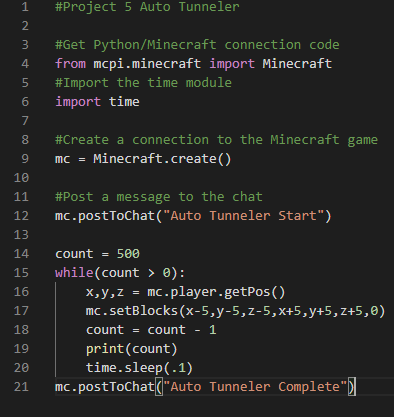
Add the code as shown here. We now have quite a bit of code inside our loop, so let’s go into detail of what is going on here.
First, we are constantly getting the position of our player through the getPos function. (Remember this is always updating because it is in the loop)
We are then using the setBlocks function to create a cube area in relation to the player. The block id we use is 0 meaning air. With this, a huge section of blocks disappears near the player!
We then update our count variable like before, what would happen if we didn’t do this?
Lastly we use something from the time library we imported. The sleep function gives the program a temporary pause, here we set it to .1 seconds. We do this because otherwise the program would run VERY fast, and we wouldn’t even get to use it (as you may have seen when we ran this in the previous page). By adding a small delay, we actually have some time to use the program in Minecraft.
Testing the code
Now that all the coding is done, let’s try it out!
If done correctly, you should create a giant tunnel wherever you move while the loop is running.
If it’s not working, go back and check your code for any errors.
Feel free to customize/edit the code to change it up! However, remember, with great power comes great responsibility. Crazy things can make your game crash if you’re not careful!