Step 5
Adding new CanvasPanel class variables
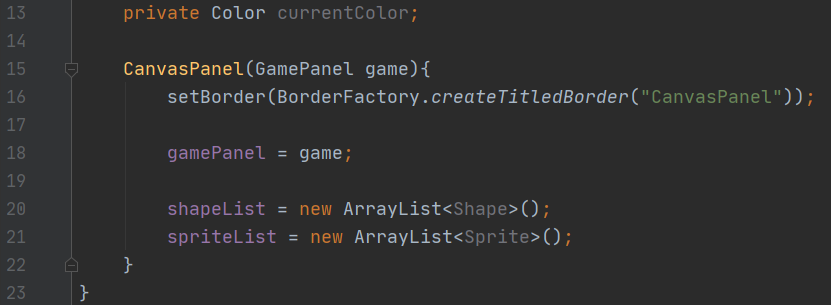
Next, let’s navigate back to the “CanvasPanel” file and add the code as shown. This will add a few new class variables that the “CanvasPanel” will be needing.
First, we make two new lists, one for “Shapes”, which we will use for drawing, and one for “Sprites.”
We also add a “Color” variable to keep track of the current color currently being used.

Modifying the CanvasPanel constructor
Now that we have two lists, we need to instantiate/construct the lists before we can use them.
Add the code as shown here to do this inside our constructor.

Creating the addSprite function
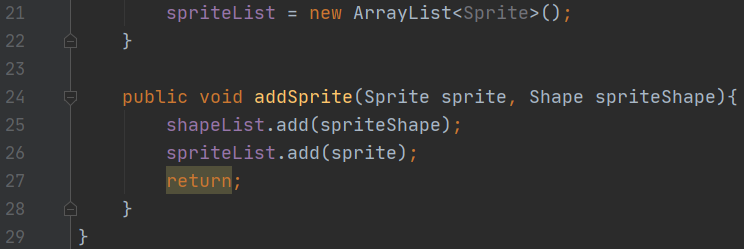
Next, let’s create the “addSprite” function we needed earlier. Copy the code as shown to do this.
This function takes a “Sprite” and a “Shape” and adds them to their respective lists.

Creating the paint function
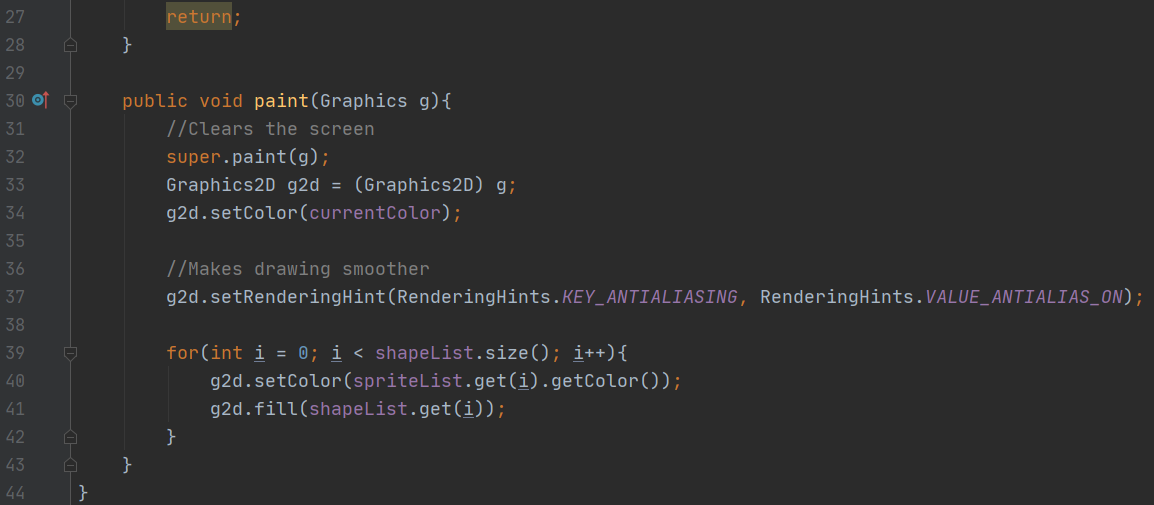
Next, let’s create the “paint” function so our “CanvasPanel” can start to draw on the screen. Complete the code as shown to do this.
Most of this is code we’ve seen before in the previous graphics projects; however, the newer code to take note of is in the for loop.
Here we loop over all the shapes in our list. We use the sprite from the spriteList to change the color with the getColor function. We then tell the Graphics system to draw the shape by using the shape from the shapeList.
With this loop, we can draw and color every single Sprite in the list! This is only possible because of interfaces!

Creating the move function
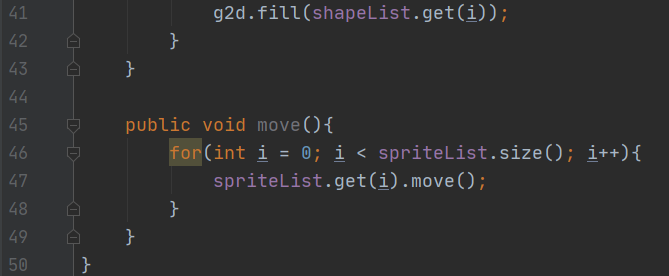
Next, let’s create the “move” function so our “CanvasPanel” can get our “Sprites” to move on the screen. Complete the code as shown to do this.
Similarly to the “paint” function, we loop through our “spriteList” telling them all to use their “move” function. This won’t do anything yet, but we might as well just code it now. Another example of interfaces in action!
Once you’ve completed this code, go back and double check all the “CanvasPanel” code for any errors. We’re almost ready to test it out, but not yet. So for now, it’s very important to find any errors as soon as possible!

