Step 11
Creating the Player class variables
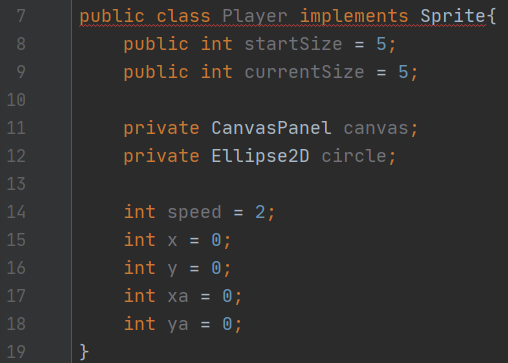
Next, open up the “Player” file and add the code as shown to create all of the class variables that “Player” will need. Don’t forget to implement “Sprite” at the top, this will give an error, but we’ll fix this soon.
Our “Player” will have the ability to get bigger as it eats more “Food.” The “startSize” variable is what size it starts as, “currentSize” is what size it is currently at.
Just like with the “Ball” we will need a reference to the canvas. Also like the “Ball” we will use an “Ellipse2D” again.
We also again have x/xa and y/ya variables for movement and positioning. The “Player” class will also have its own “speed” variable.
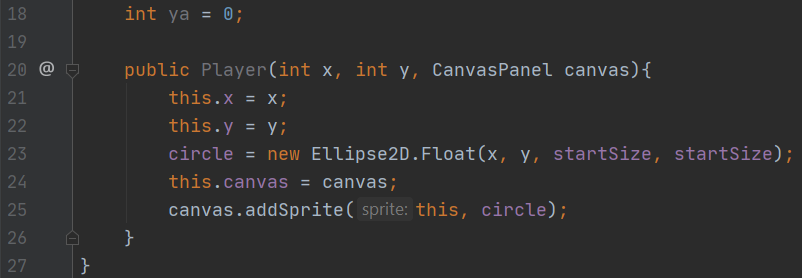
Creating the Player constructor
Next, complete the code as shown here to create the “Player” constructor. The code here is essentially the same as the “Ball” constructor. If you need a refresher on how any of this code works, go check out the explanation from earlier.
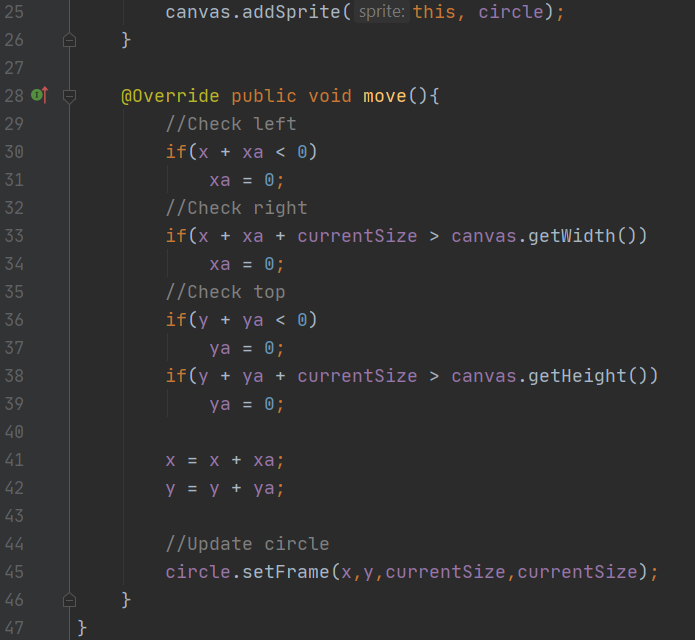
Creating the Player move function
Next, complete the code as shown here to create the “move” function for the “Player”.
Again, the code here is almost exactly the same as in “Ball.” The main difference here is that we don’t want the “Player” to bounce on edges, so if they are at an edge, we just stop their movement speed by setting it to 0. This will give the effect of blocking them from traveling off the game screen.
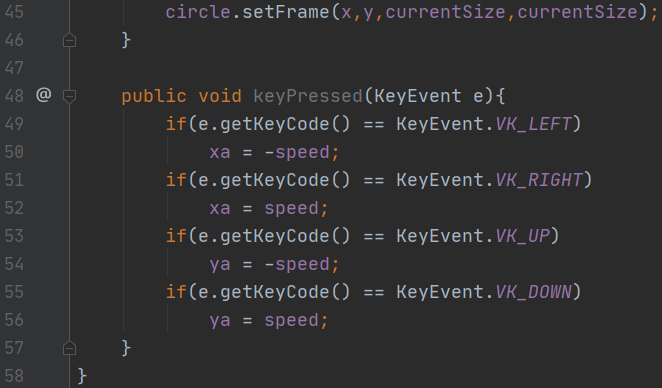
Creating the Player keyPressed function
Next, complete the code as shown here to create the “keyPressed” function for the “Player”.
This function will change our xa and ya variables depending on which keys get pressed. Remember, this isn’t the code that detects key presses, just what happens after. We’ll code the detection part later.
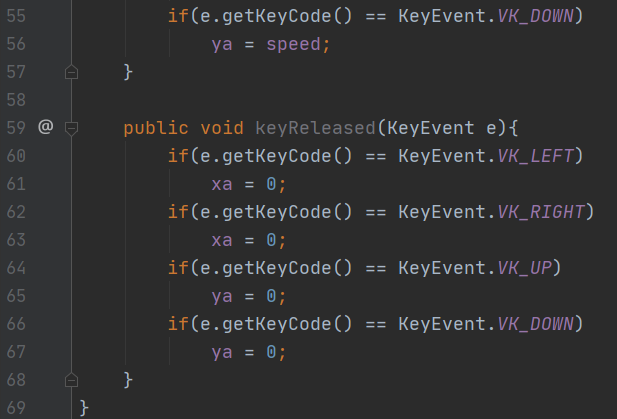
Creating the Player keyReleased function
Next, complete the code as shown here to create the “keyReleased” function for the “Player”.
This function will set our xa and ya variables to 0 depending on which keys get released. Remember, this isn’t the code that detects key releases, just what happens after. We’ll code the detection part later.
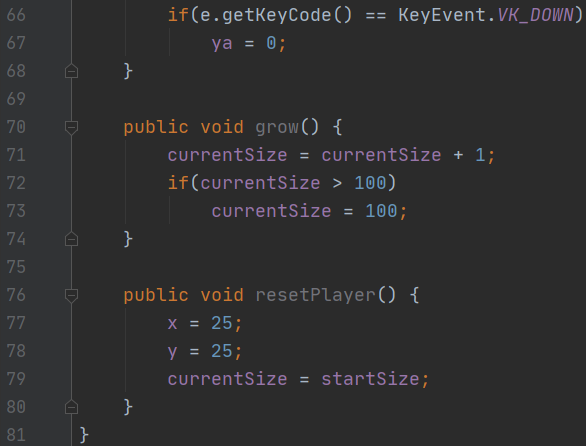
Creating the Player grow and resetPlayer functions
Next, complete the code as shown here to create the “grow” and “resetPlayer” functions for the “Player”.
The “grow” function will allow our player to grow to a bigger size, up to a max of 100.
The reset() function will allow us to reset the player’s size and position if needed.
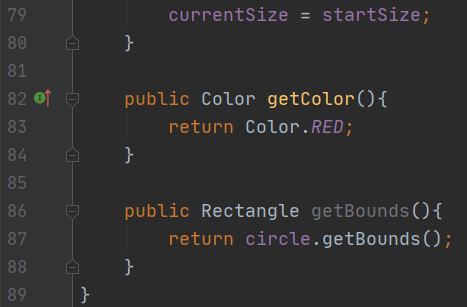
Creating the Player getColor and getBounds functions
Next, complete the code as shown here to create the “getColor” and “getBounds” functions for the “Player”.
The “getColor” function is self-explanatory. The “getBounds” function will be used to help with our collision. (Remember how it was used last project?)
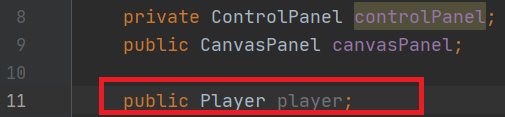
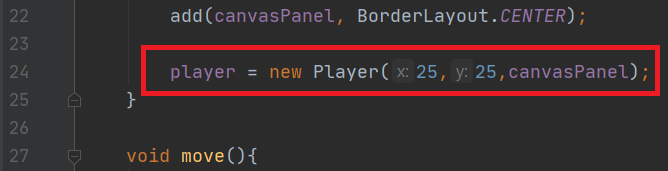
Adding a player to the game
We are now done with the “Player!” Next, we need to add it into the game. Open up the “GamePanel” file to do this.
First we will need to make a new “Player” class variable so our game always has access to its data. Then we will need to instantiate/construct it inside the “GamePanel” constructor.
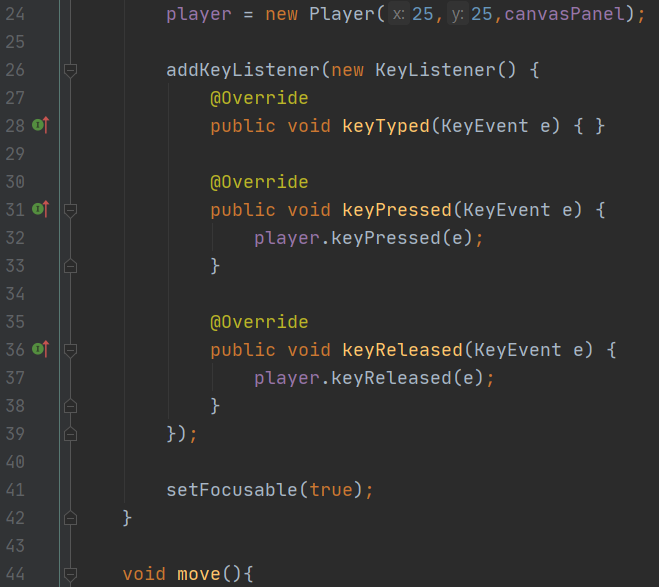
Detecting keyboard input in the game
Next, we need to get our “GamePanel” to listen for KeyEvents in order to move the player. Complete the code as shown to do so.
Remember, we also need to set the window to be focusable so we can interact with it! (Line 41)
Again, take care take care with the punctuation here, it is very easy to mess it up.
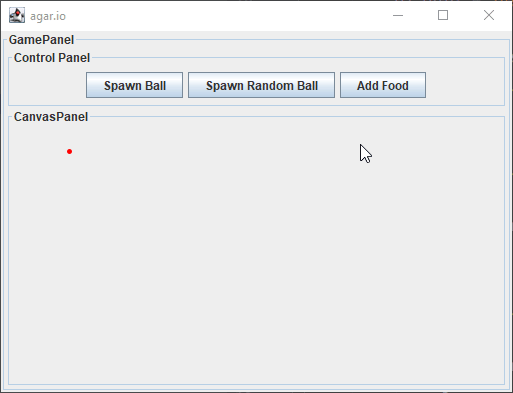
Testing out the Player
After this go ahead and run the code to try it out! You should see the player on the screen and be able to control it with the arrow keys!
Remember, you might need to click on the game to get it to work. If it doesn’t work, go back and check your code for any errors.