Step 8
Adding new ControlPanel class variables
Next, let’s add a button to create more balls! Open the “ControlPanel” file and add the code as shown here.
Here we create two new “JButton” variables. A “JButton” is used to create buttons within a “JPanel”, we are going to make two for now.
The “ballSpawnButton” will be used to spawn a ball, the “randomBallSpawnButton” will be used to spawn a ball at a random x,y position.

Completing the ballSpawnButton
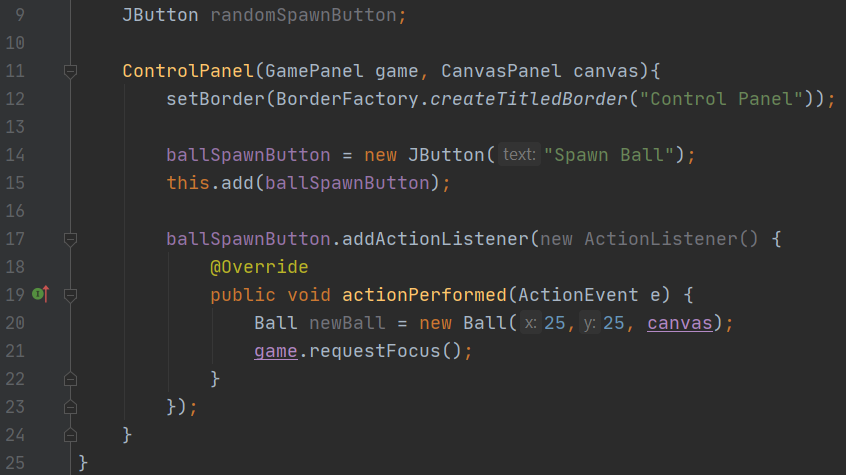
Next, let’s complete the code to actually create the button. Update the constructor with the code shown here to do this. Be careful with the code starting at line 17, there is a lot of punctuation that is very easy to mess up.
On lines 14-15, we create the button with the label “Spawn Ball” and add it into the panel (“CanvasPanel”).
Next, we add something called an “actionListener” to the button. This function will listen for the event of the button being clicked.
Here we say that once the button is clicked, we make a ball at x:25 y:25. We also tell the game to stay in focus and not the button, which will be important when we make a player. Remember, the thing that is in focus is what registers all the keyboard button pushes.
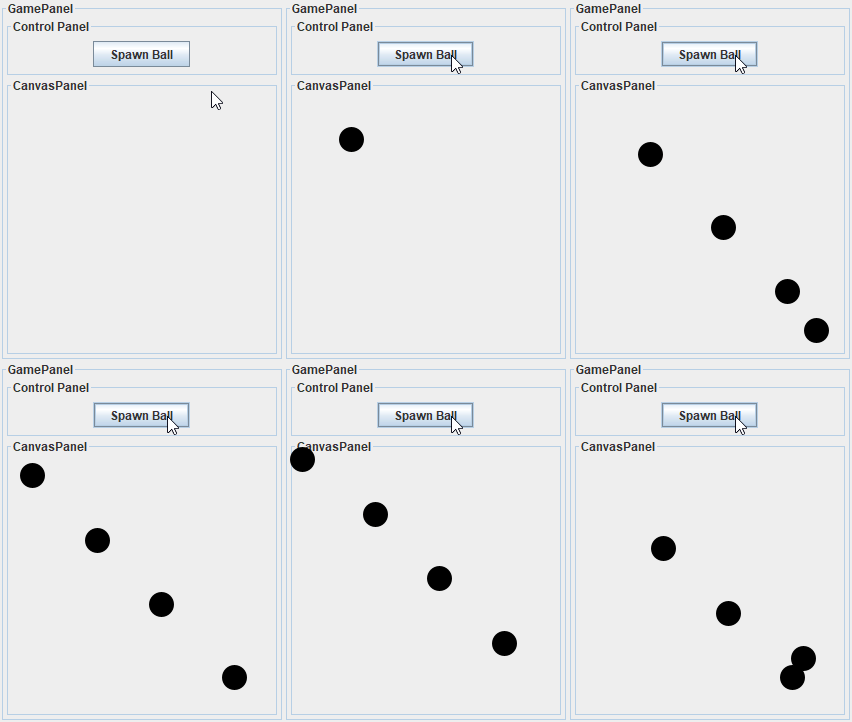
At this point, you can go back to “Main” and delete the “Ball” we created earlier for testing. Now we can make “Balls” with this new button! Deleting this code is optional, but that is what was done in the example shown here.
After all this, test out your code and try pushing the button! If done correctly, you should be able to create a “Ball” every time you click it!


