Making a Function
As a reminder, Functions are like mini-tasks that we might want to happen at a lot of different times. So we tie them all to one word that way it’s easier to place that task in many places.
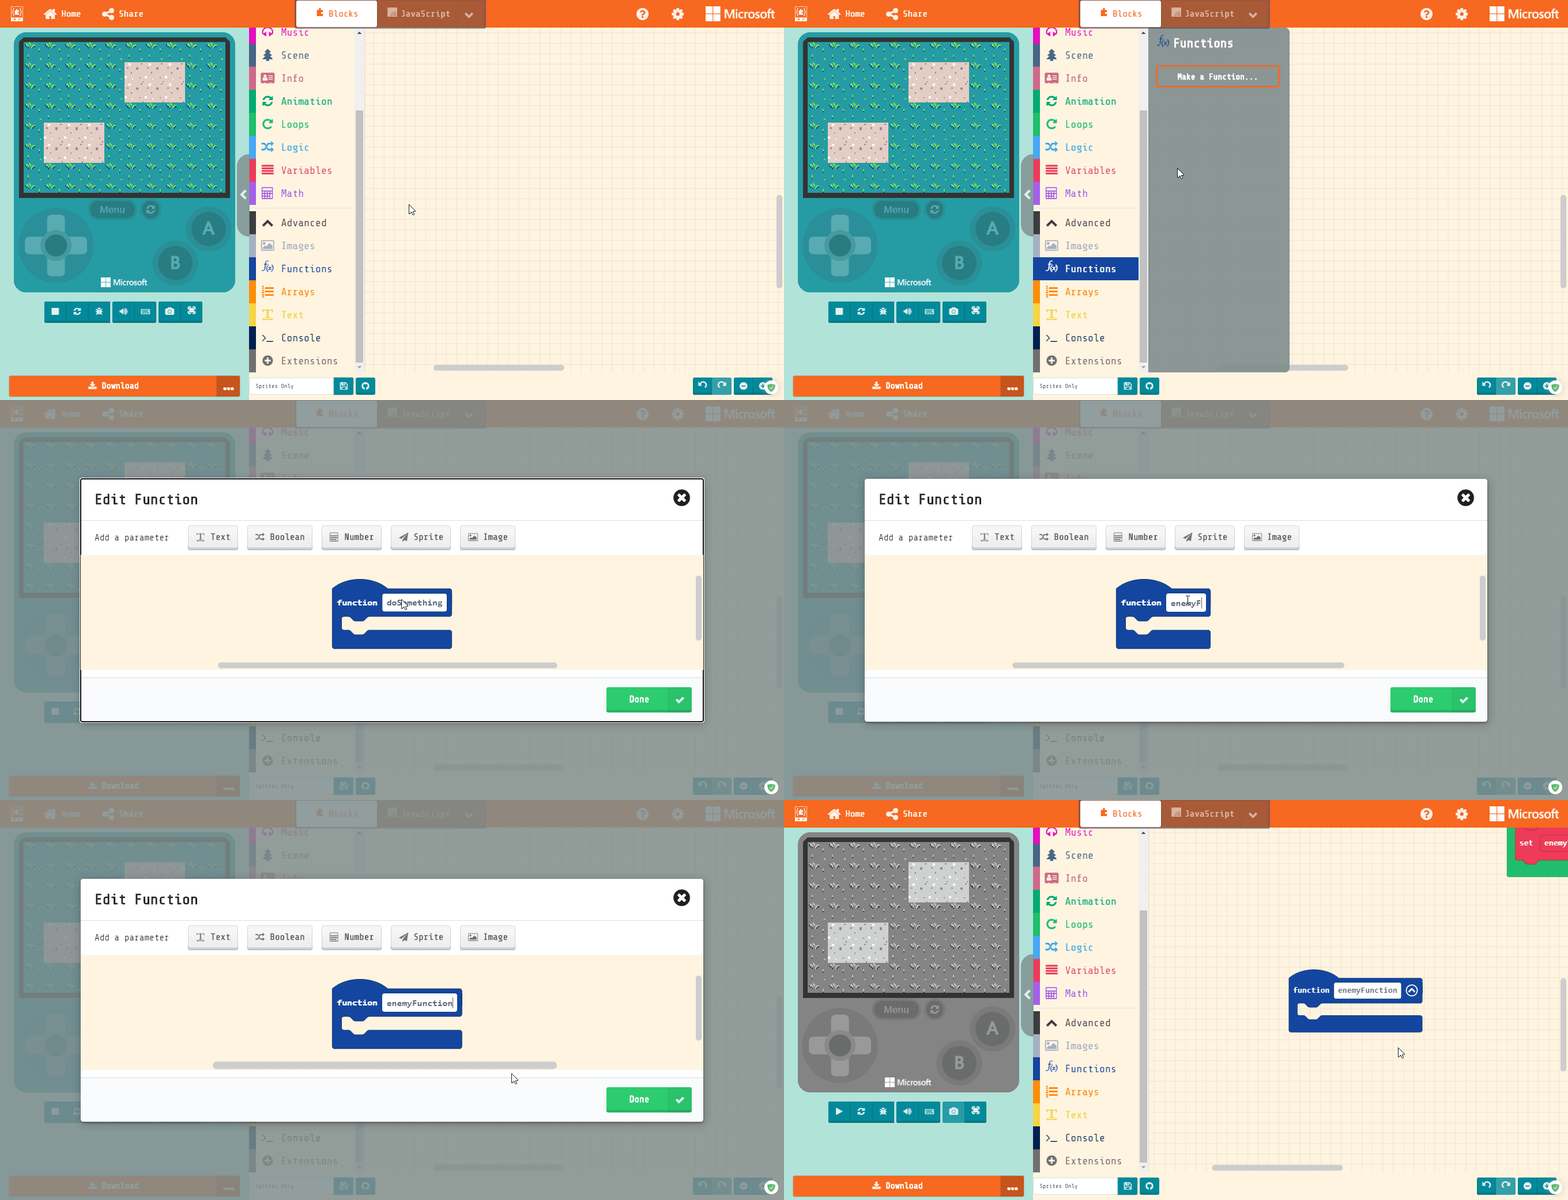
Under Advanced, you’ll find the Functions section with the option to Make a New Function called “enemyFunction”. This will tell the game how to pick the sprites for the enemy.
Preventing an Error
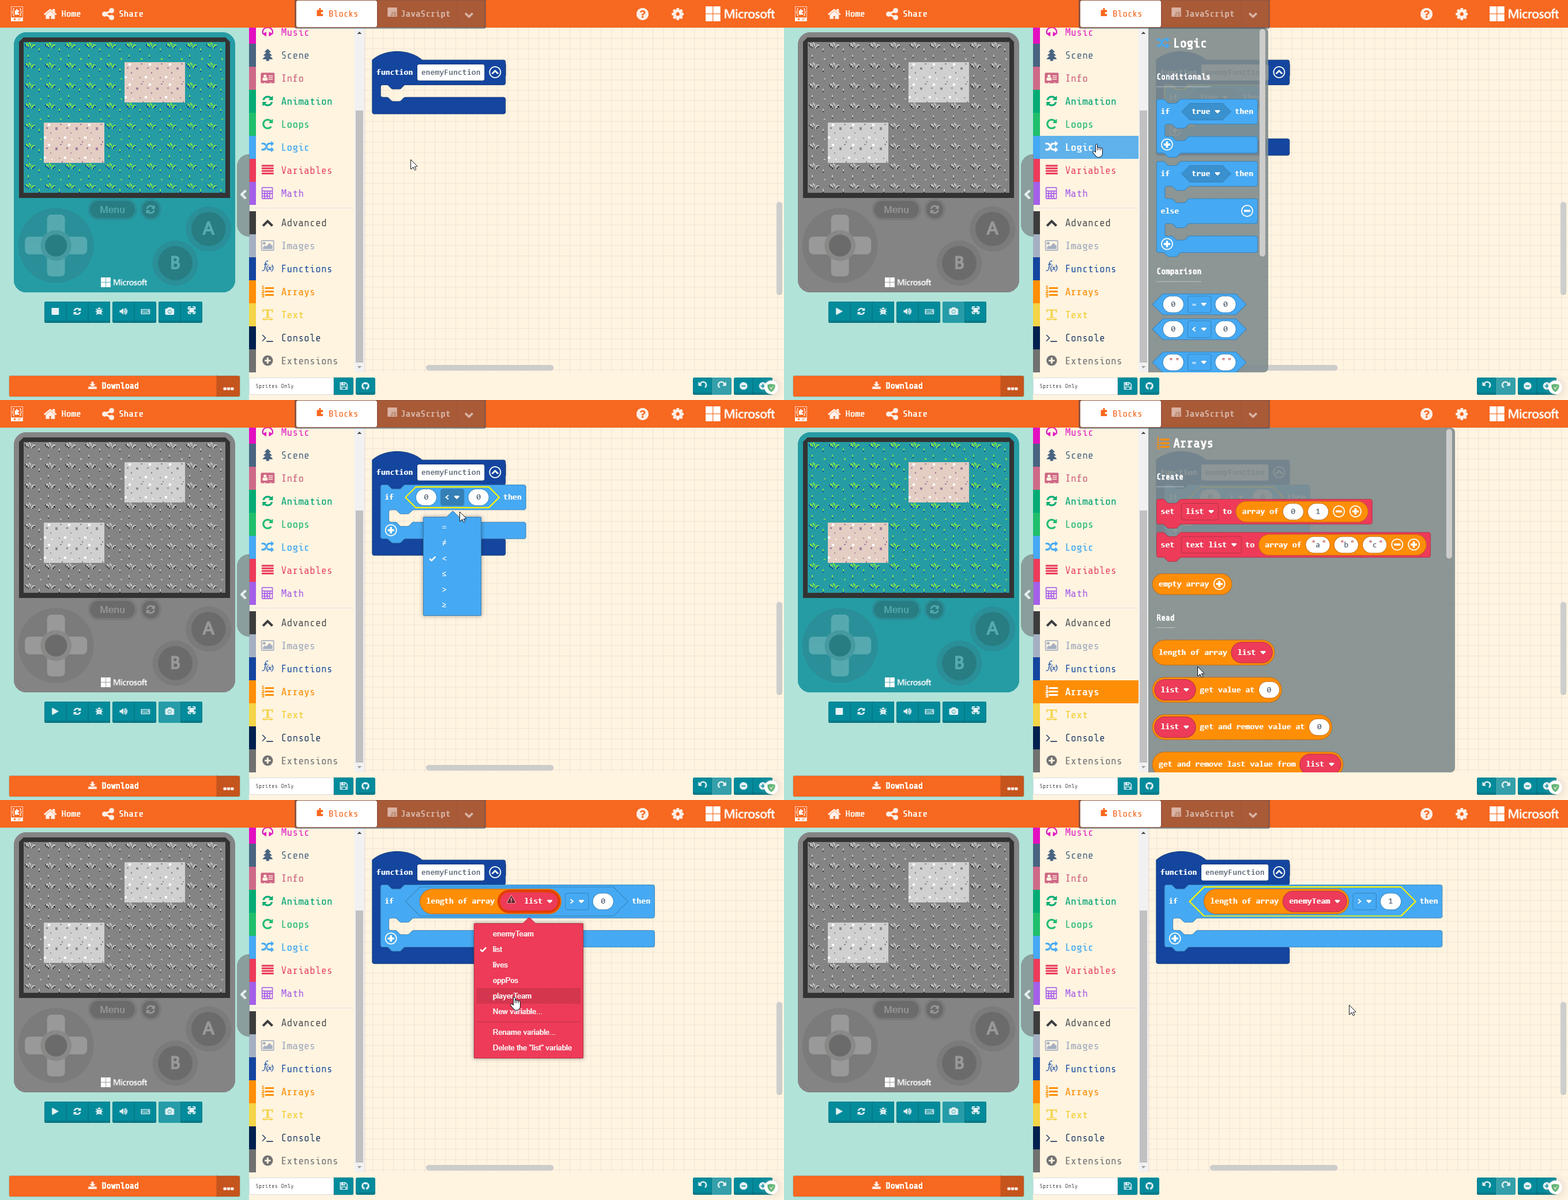
Normally, you have to fix an error already made instead of preventing it. Luckily, you’ve got us! If the enemyTeam array ever has zero sprites in it, then it won’t know what to do. So we need to tell it only to do this function if the array has sprites.
From the Logic section, grab an “if true then” block and drop it into our function. Then, from the Logic section again, grab a comparison block and change it to be “greater than” “>” (make sure the “mouth” is facing to the left!)
Finally, fill the left side with “length of array list” from the Arrays section and change the list to “enemyTeam” greater than “1”.
Filling In the Function
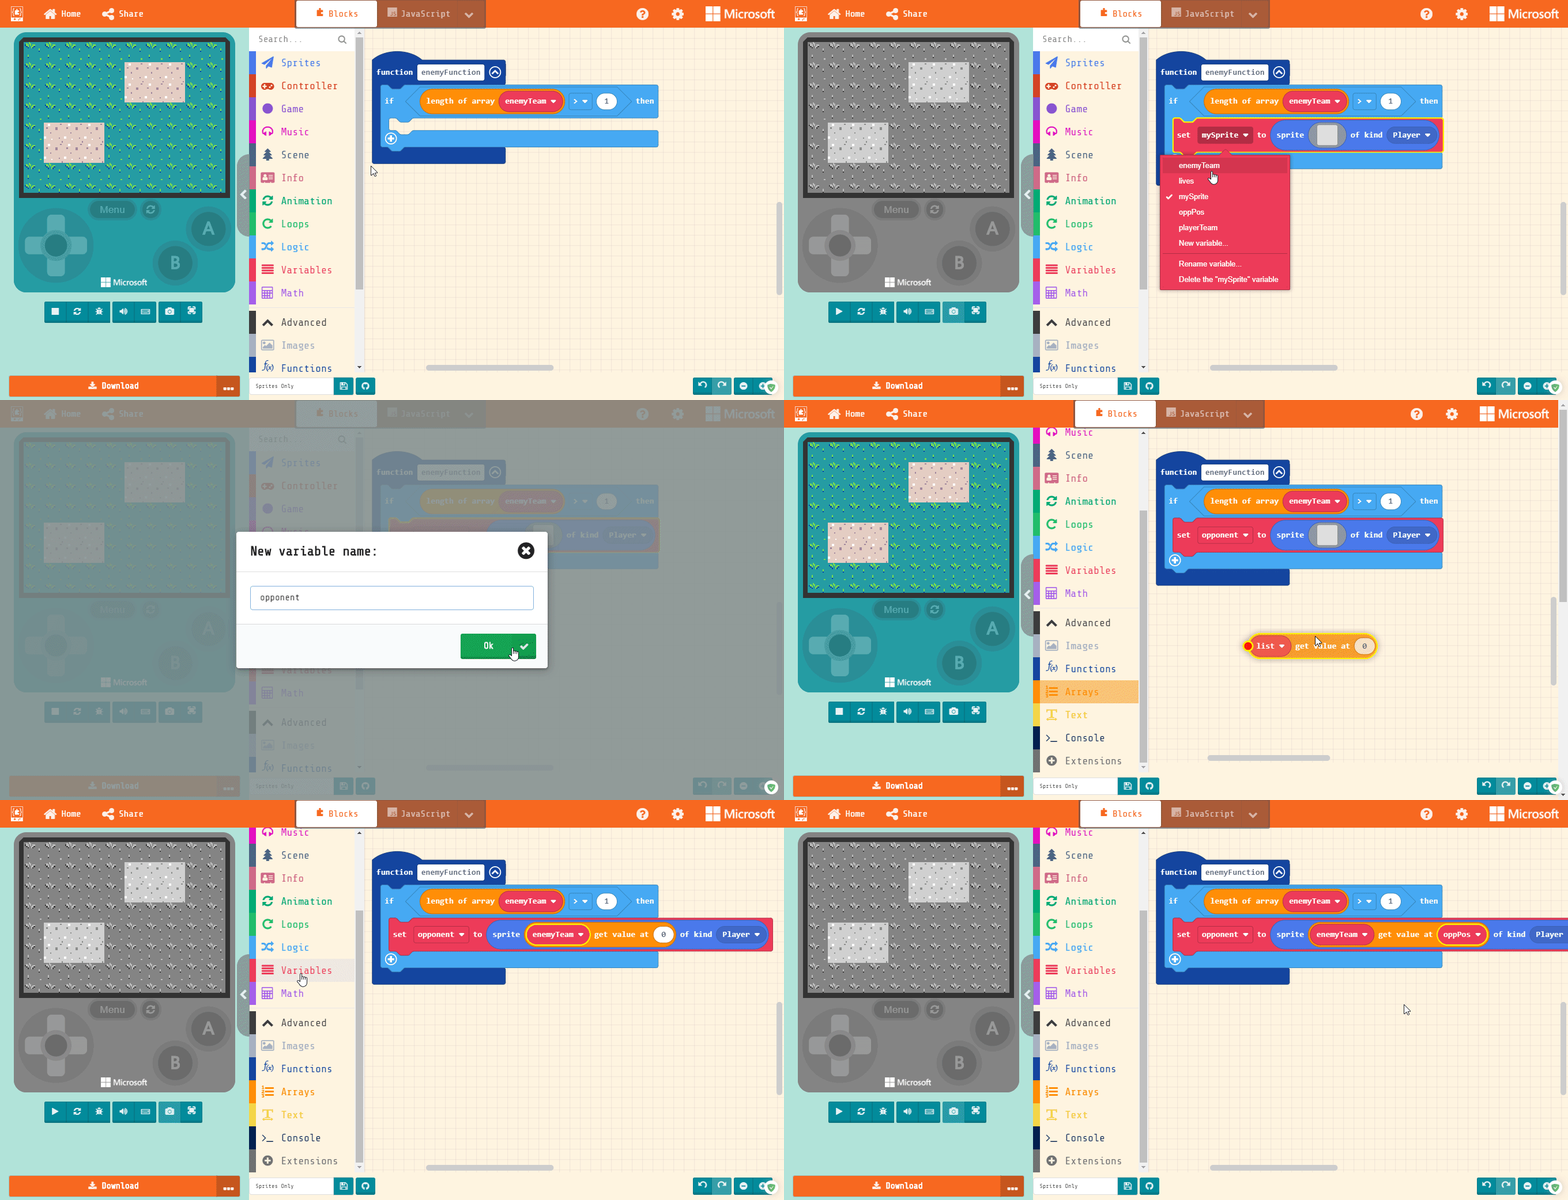
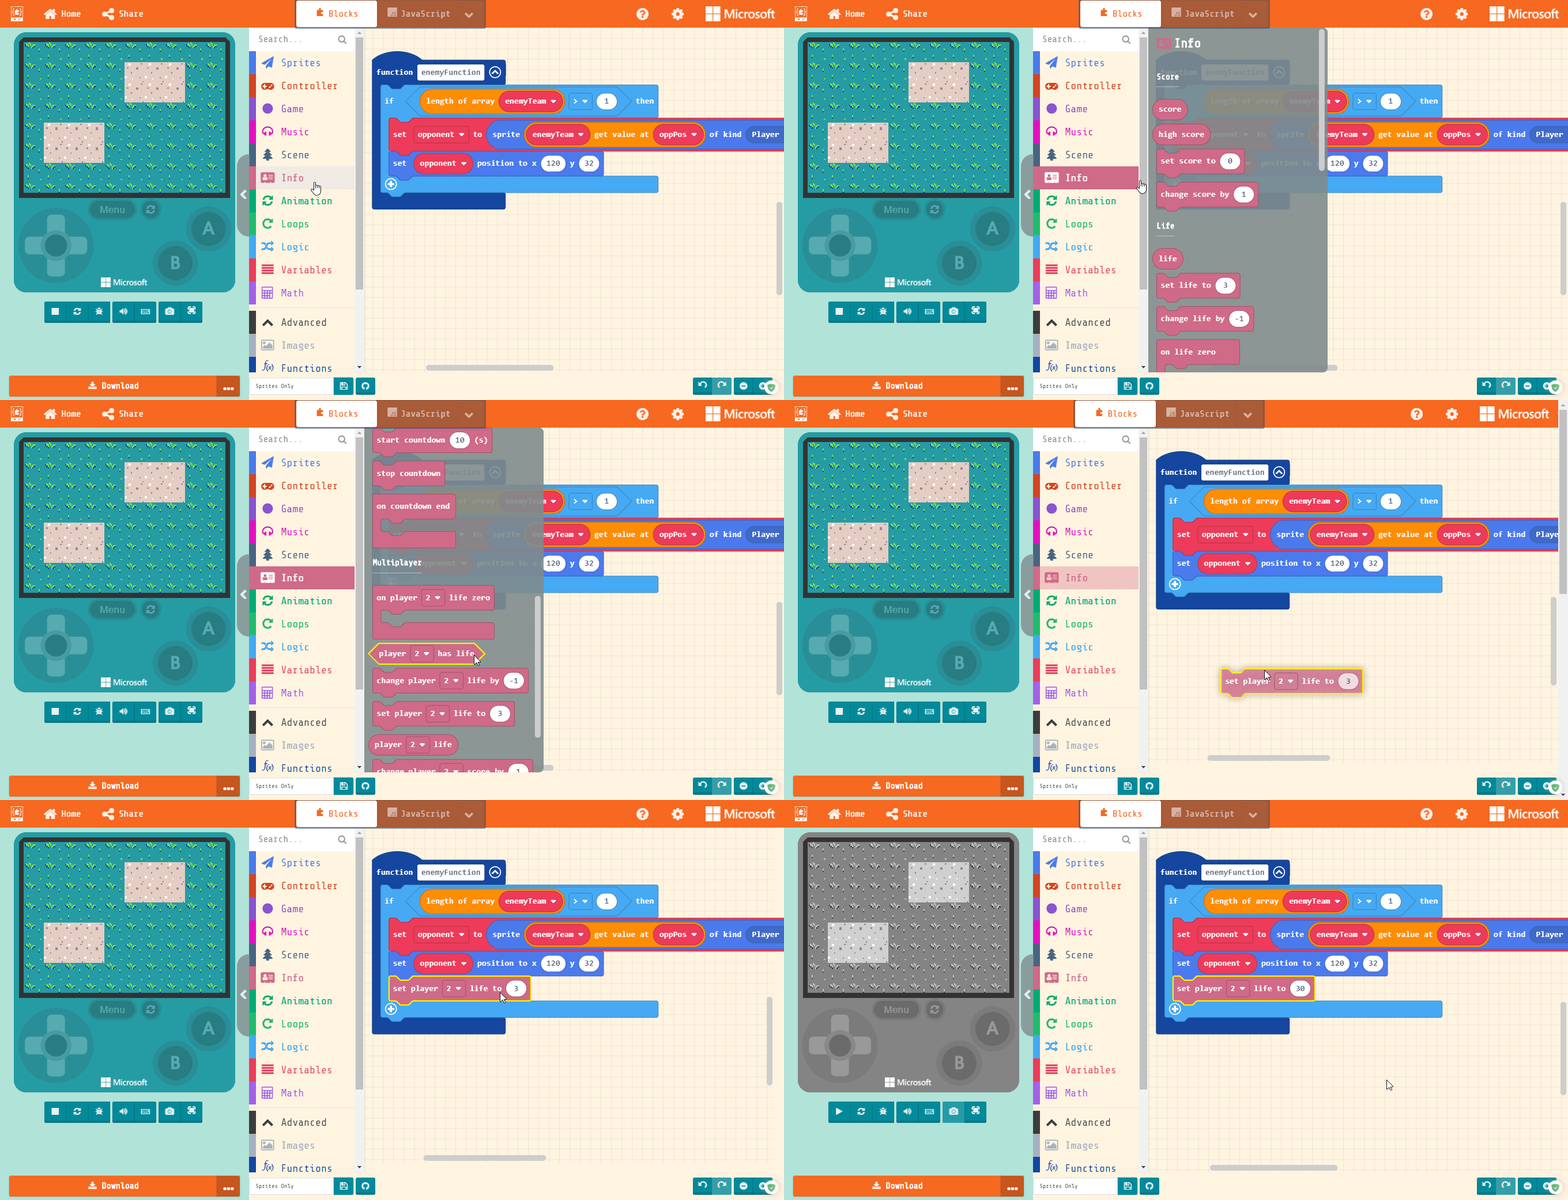
First, we need to tell the opponent what sprite to be. So grab a “set mySprite to” block from the Sprites section. Make a new variable called “opponent”. Then we’re going to fill it with the Arrays block “list get value at 0”. Make sure to change list to “enemyTeam” and fill the zero with “oppPos”.
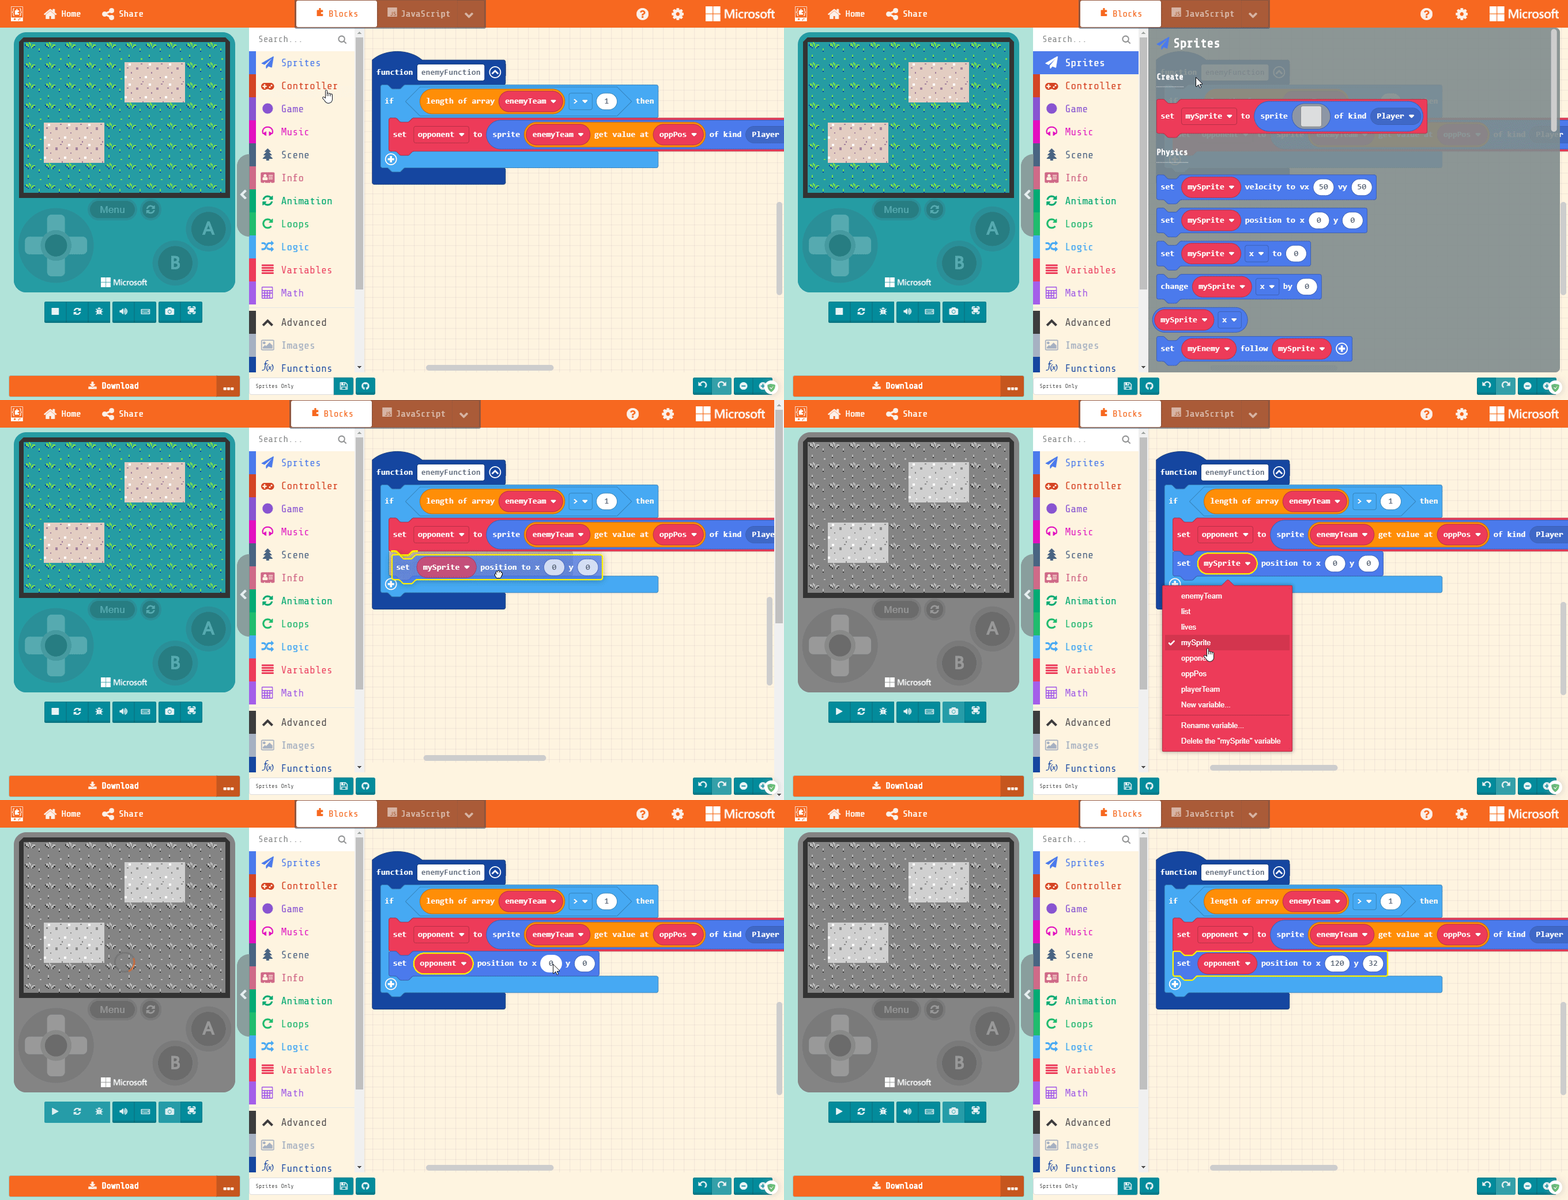
Now we need to set where the enemy spawns. Easy enough, we just pick a “set mySprite position to…” block from the Sprites section. Change the mySprite to “opponent”, change the x to 120, and the y to 32.
Lastly, we need to add health to our opponent. This is why we left our opponent as a player. In the Info section, near the bottom, there’s a “set player 2 life to” block, and we’re making that 30 HP (health points).
