Step 8
Creating the ArmoredFighter class
Next, let’s go ahead and create a new java class. Call it “ArmoredFighter”.
This Fighter will behave just like a normal Fighter except for one thing, it will have an armor value.
The way armor will work is that it will subtract from the damage the Fighter would have normally taken from an attack. For example, if a Fighter has 2 armor and takes 3 damage, the Fighter will only take 1 damage because the armor absorbs 2.
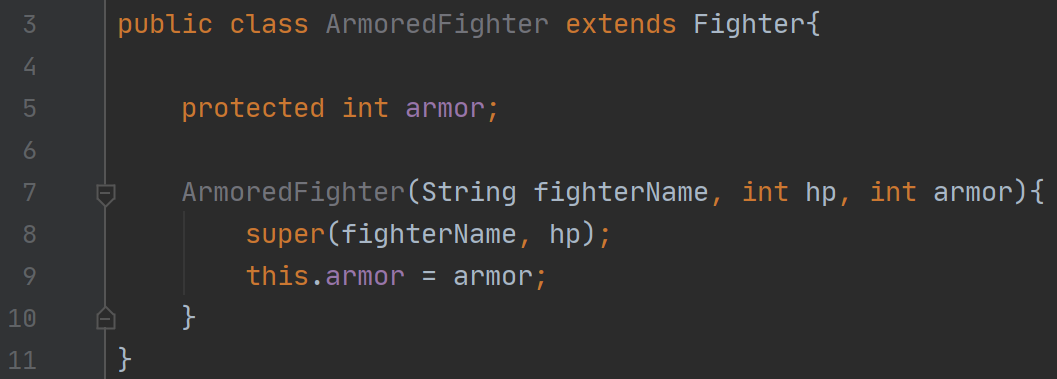
Creating the ArmoredFighter constructor
Now let’s go ahead and copy the code as shown here to create the constructor for the “ArmoredFighter” class. Don’t forget to create the “armor” class variable and to add the “extends Fighter” at the top!
This constructor is very similar to the ones we’ve seen with our other two classes. We first need to use the constructor of our parent class (because to make an “ArmoredFighter” we must first make a “Fighter.”)
After this, we just save our armor value and we’re good to go. Next, we need to change how our “ArmoredFighter” takes damage.
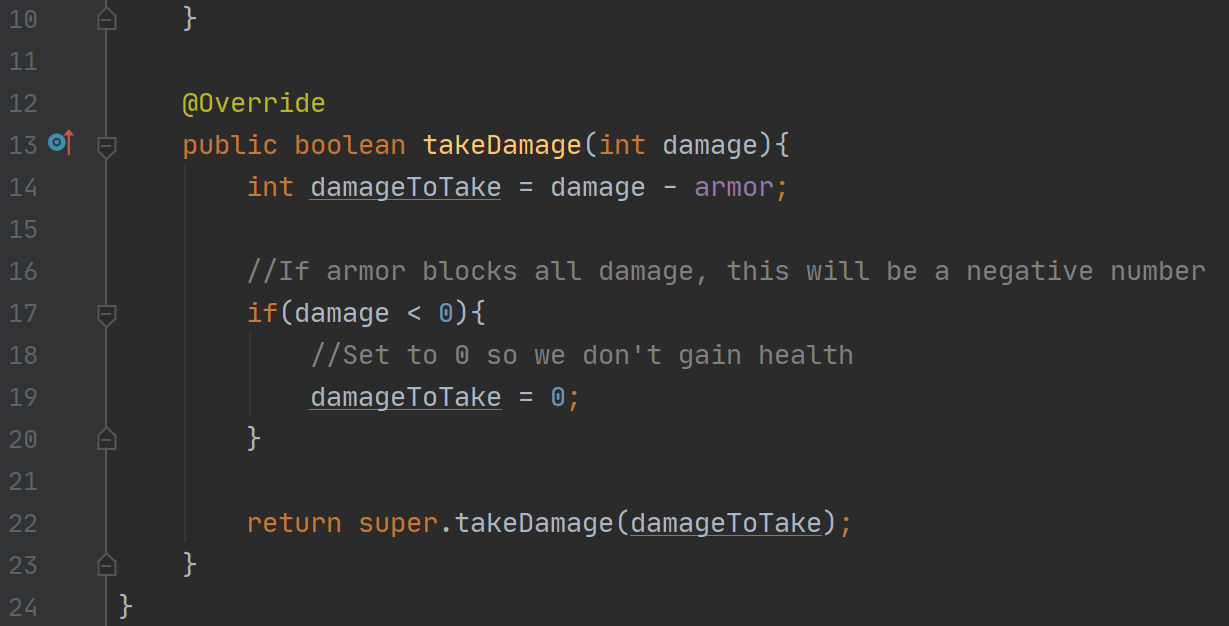
Overriding the takeDamage function
In order to use our armor, we need to override the original “takeDamage” function from “Fighter” to take the armor into its calculations. Copy the code as shown here to do this. Don’t forget the “@Overide” at the top!
The first thing need to do is calculate how much damage we should be taking. We do this with the simple forumla of “damage – armor.”
Once we’ve done this, we need to do a quick check to make sure our damage isn’t a negative number. This will happen if our armor value is higher than the damage we are supposed to take! If it is, the armor just blocks all the damage and we set it to 0. If we didn’t do this, the negative values would give our “ArmoredFighter” health with some attacks!
On the last line, we use the original “takeDamage” function of the “Fighter” class. We do this because since we already have the damage calculated, we might as well use the function since it works and it’s already all coded. This saves us some extra coding!
Once this is all coded, the “ArmoredFighter” is all done! We’ll show some example code on how to use it in the next section.