The Tilemap
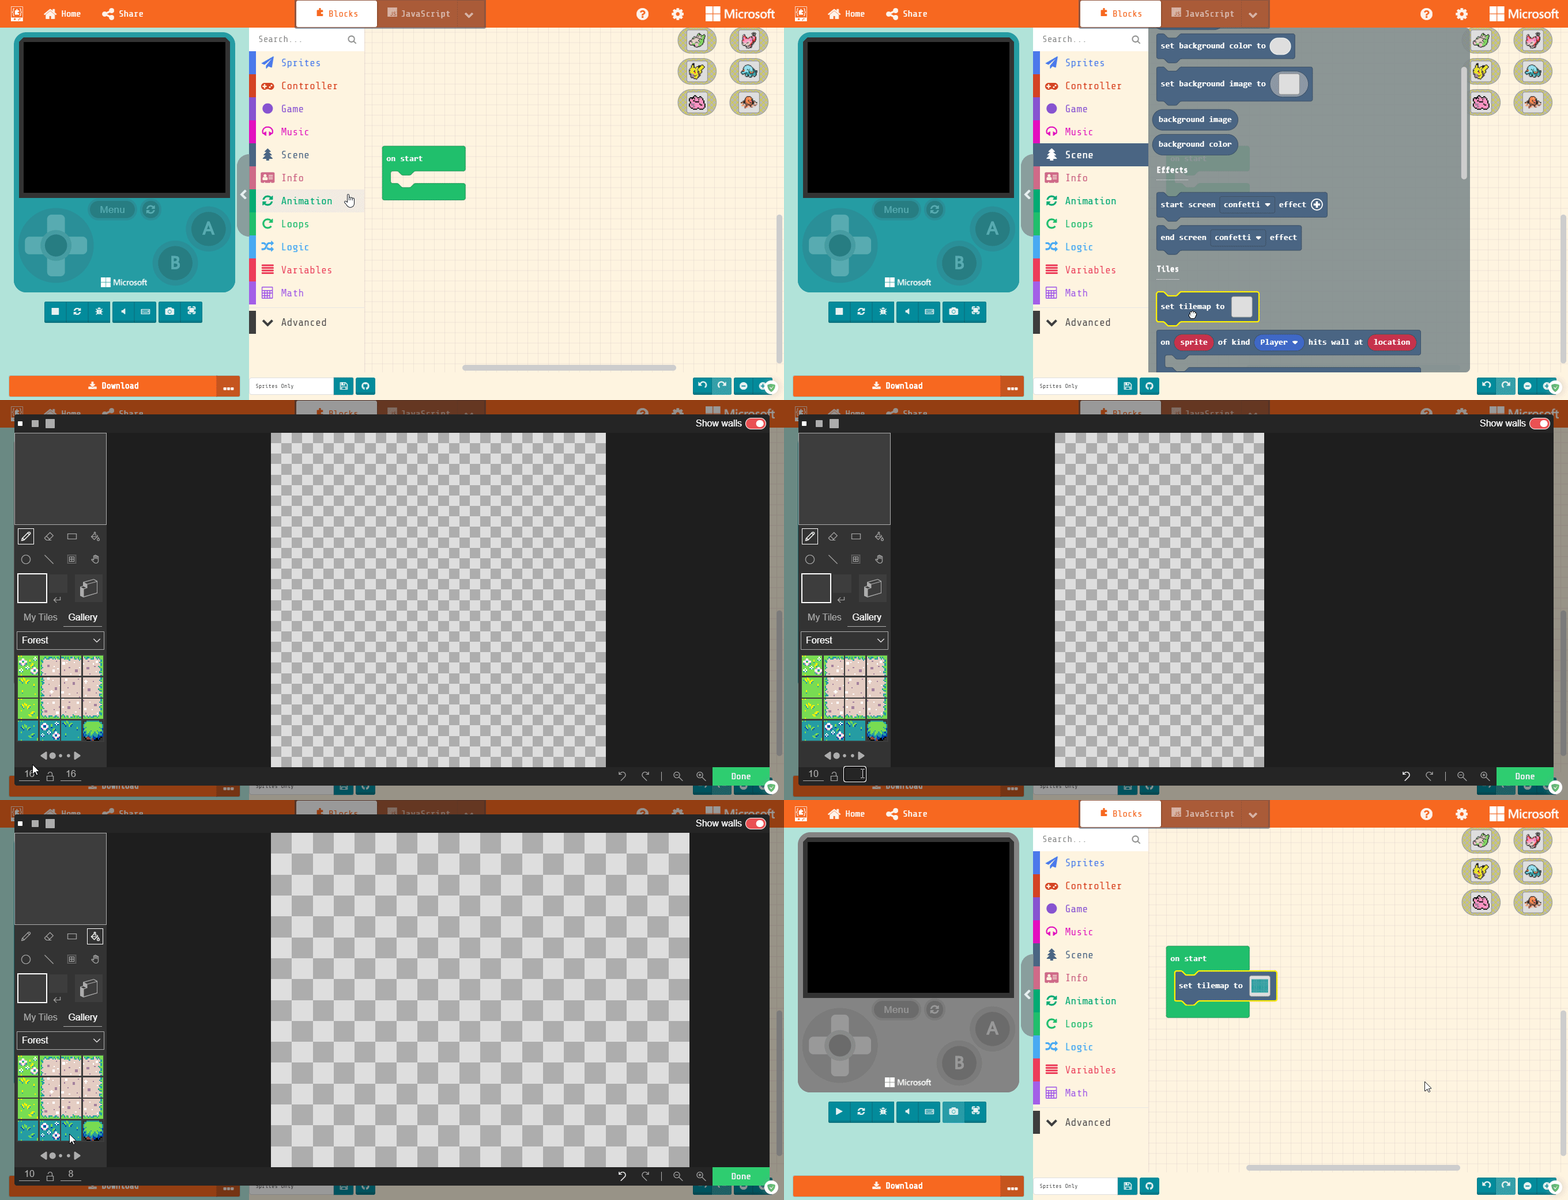
The tilemap block, located in our Scene section, sets the size and look of our in-game world. It is different from the background block because it’s more than just a picture; it’s something we can actually use in our code.
We resize the tilemap so it fits as closely to our screen as possible. Our screen is just a little under 10×8, so that’s what we will use.
For now, we will keep it simple. You can fill your tilemap with the paint bucket tool. You can also add a splash of other tiles using the pencil tool.
Setting mySprite
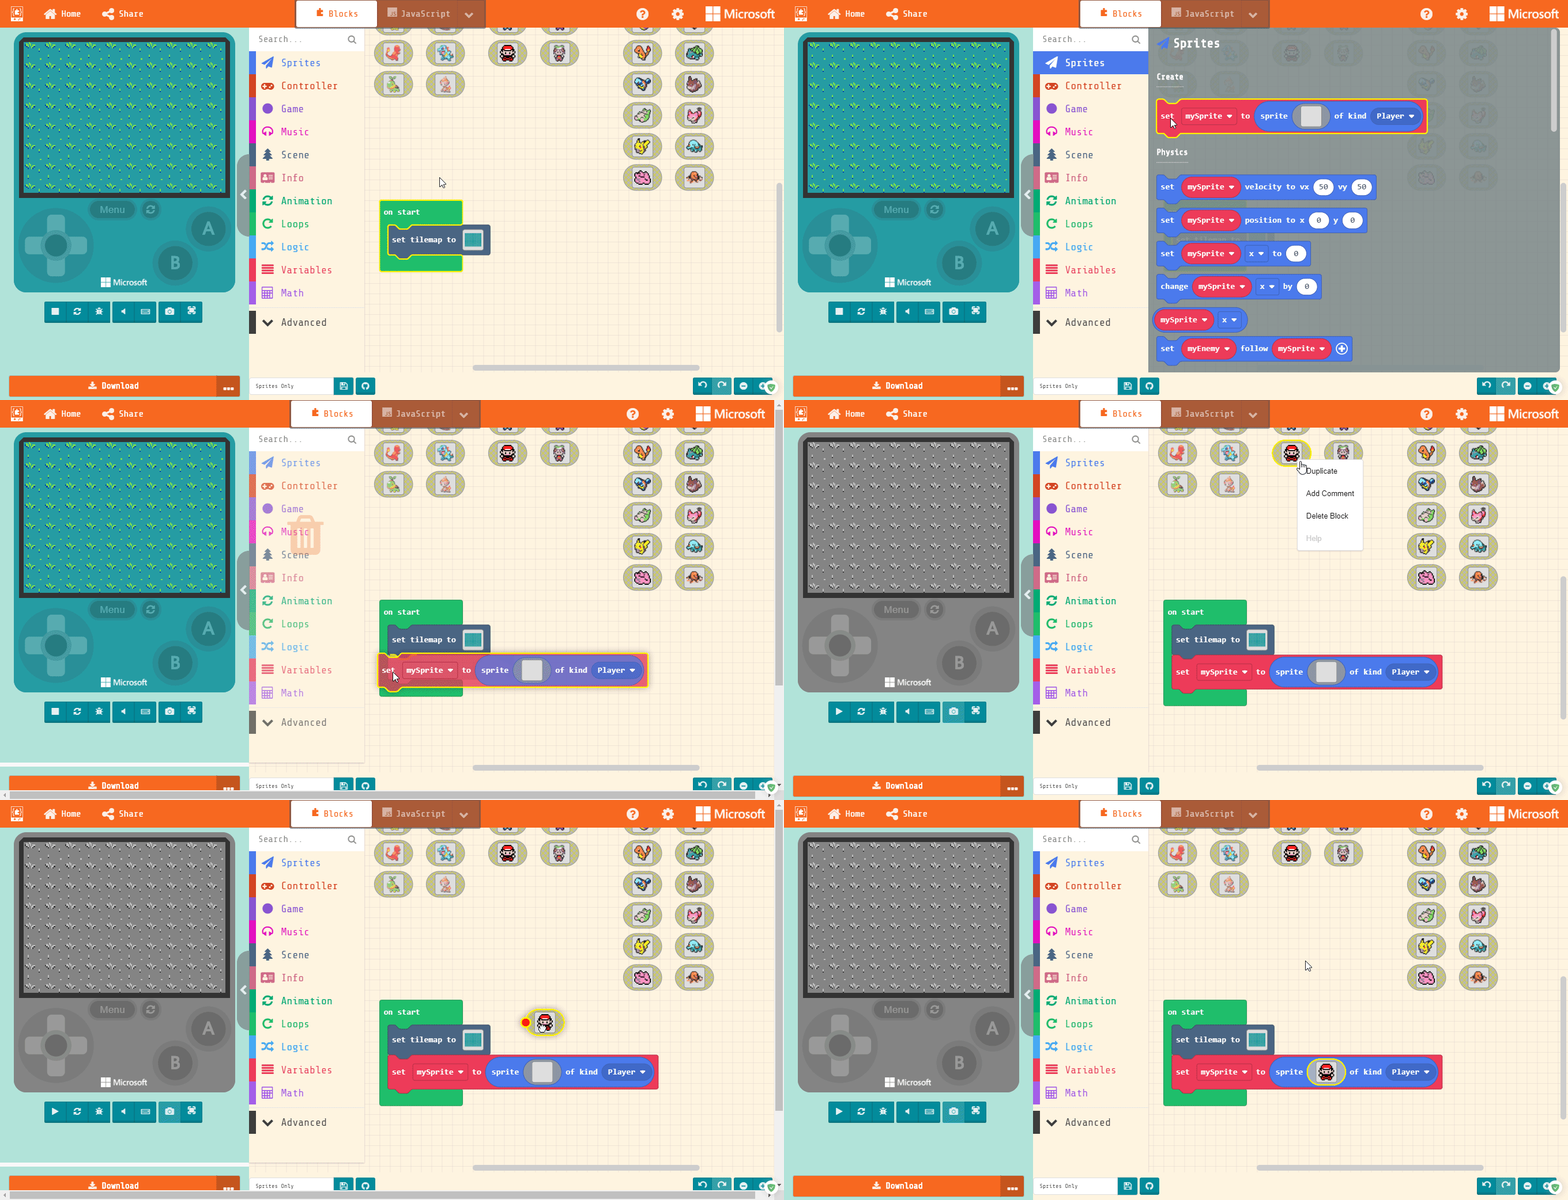
All of our sprites can be made from the Sprites section. They will always say “mySprite” and possibly a number after it. It’s up to you to rename the sprites and make sure that your other sprite blocks match the names.
If you look, there are already sprites made for you. If you right-click on one, you can duplicate it and drag-and-drop it into your mySprite’s image.
Soon, we will learn to change our sprites “kind”. For now, we will leave it as Player, because that’s us!
Gaining Control
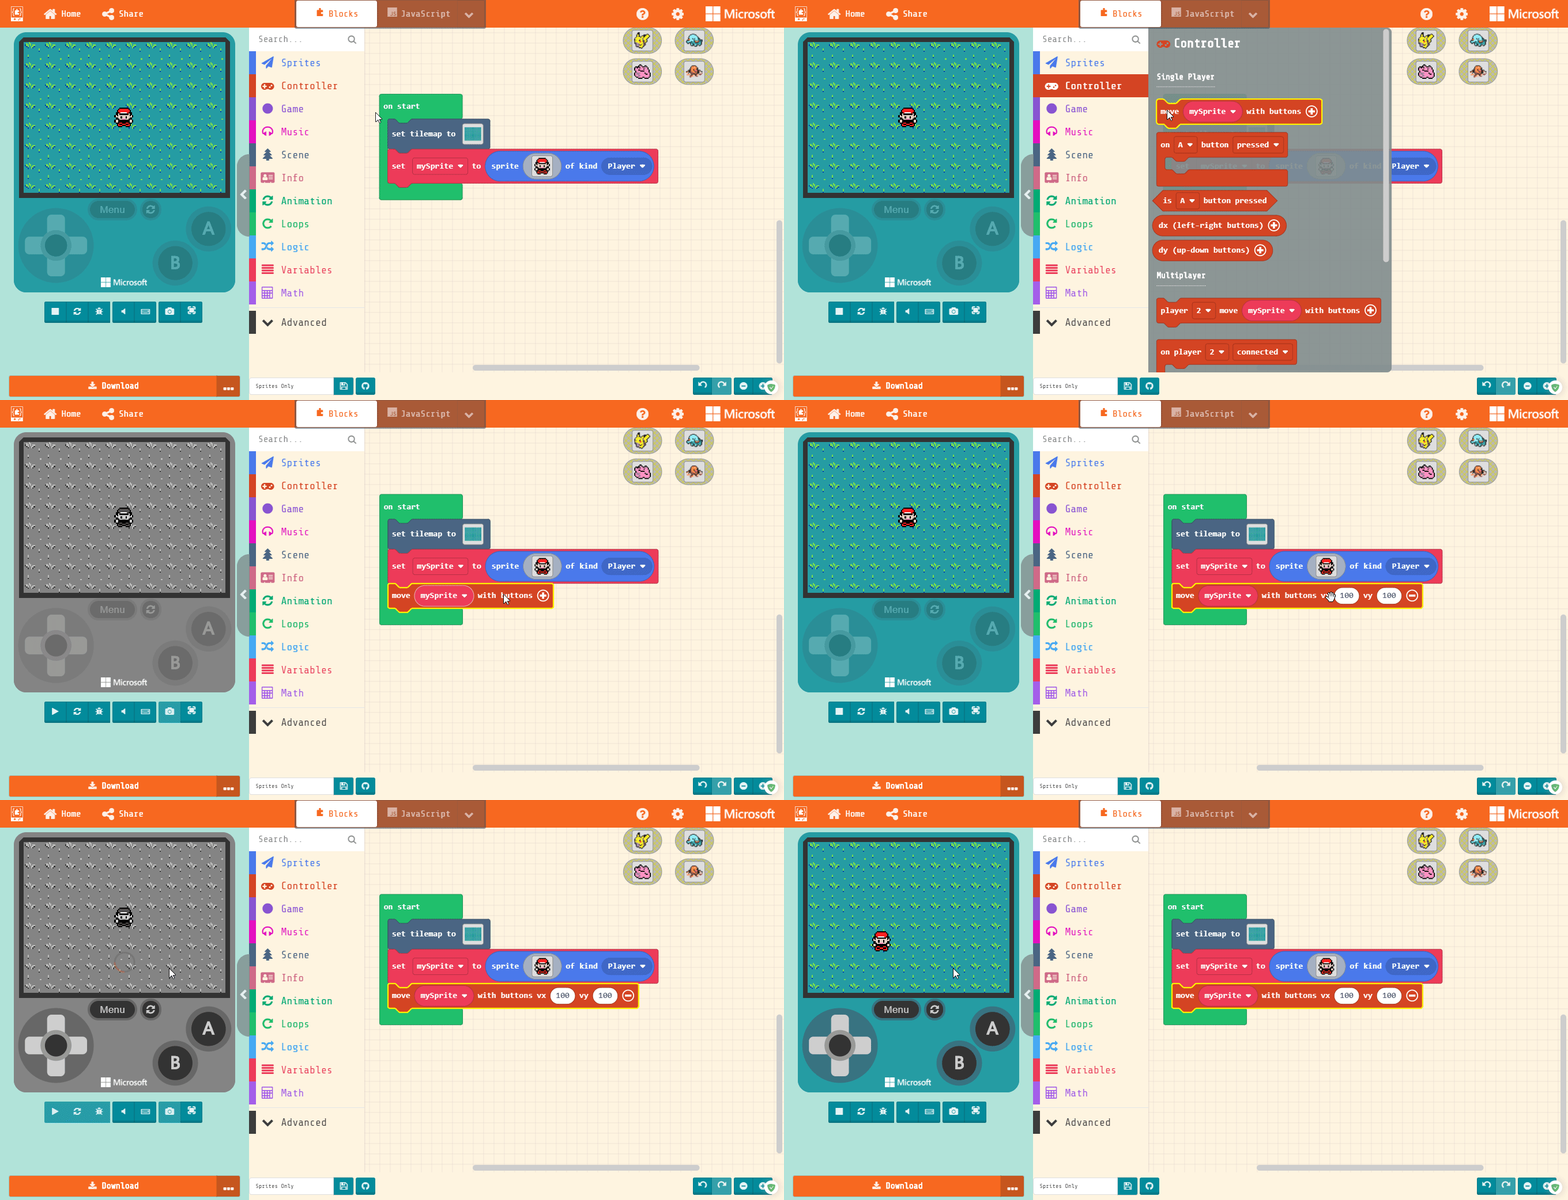
One of the major improvements from Scratch that MakeCode has is that we only need ONE block to move our character. In the Controller section, there’s the block “move mySprite with buttons.
Make sure the speed is 100 for both x (left and right) and y (up and down) movement by clicking the plus sign at the end of the block..
Keep us on screen
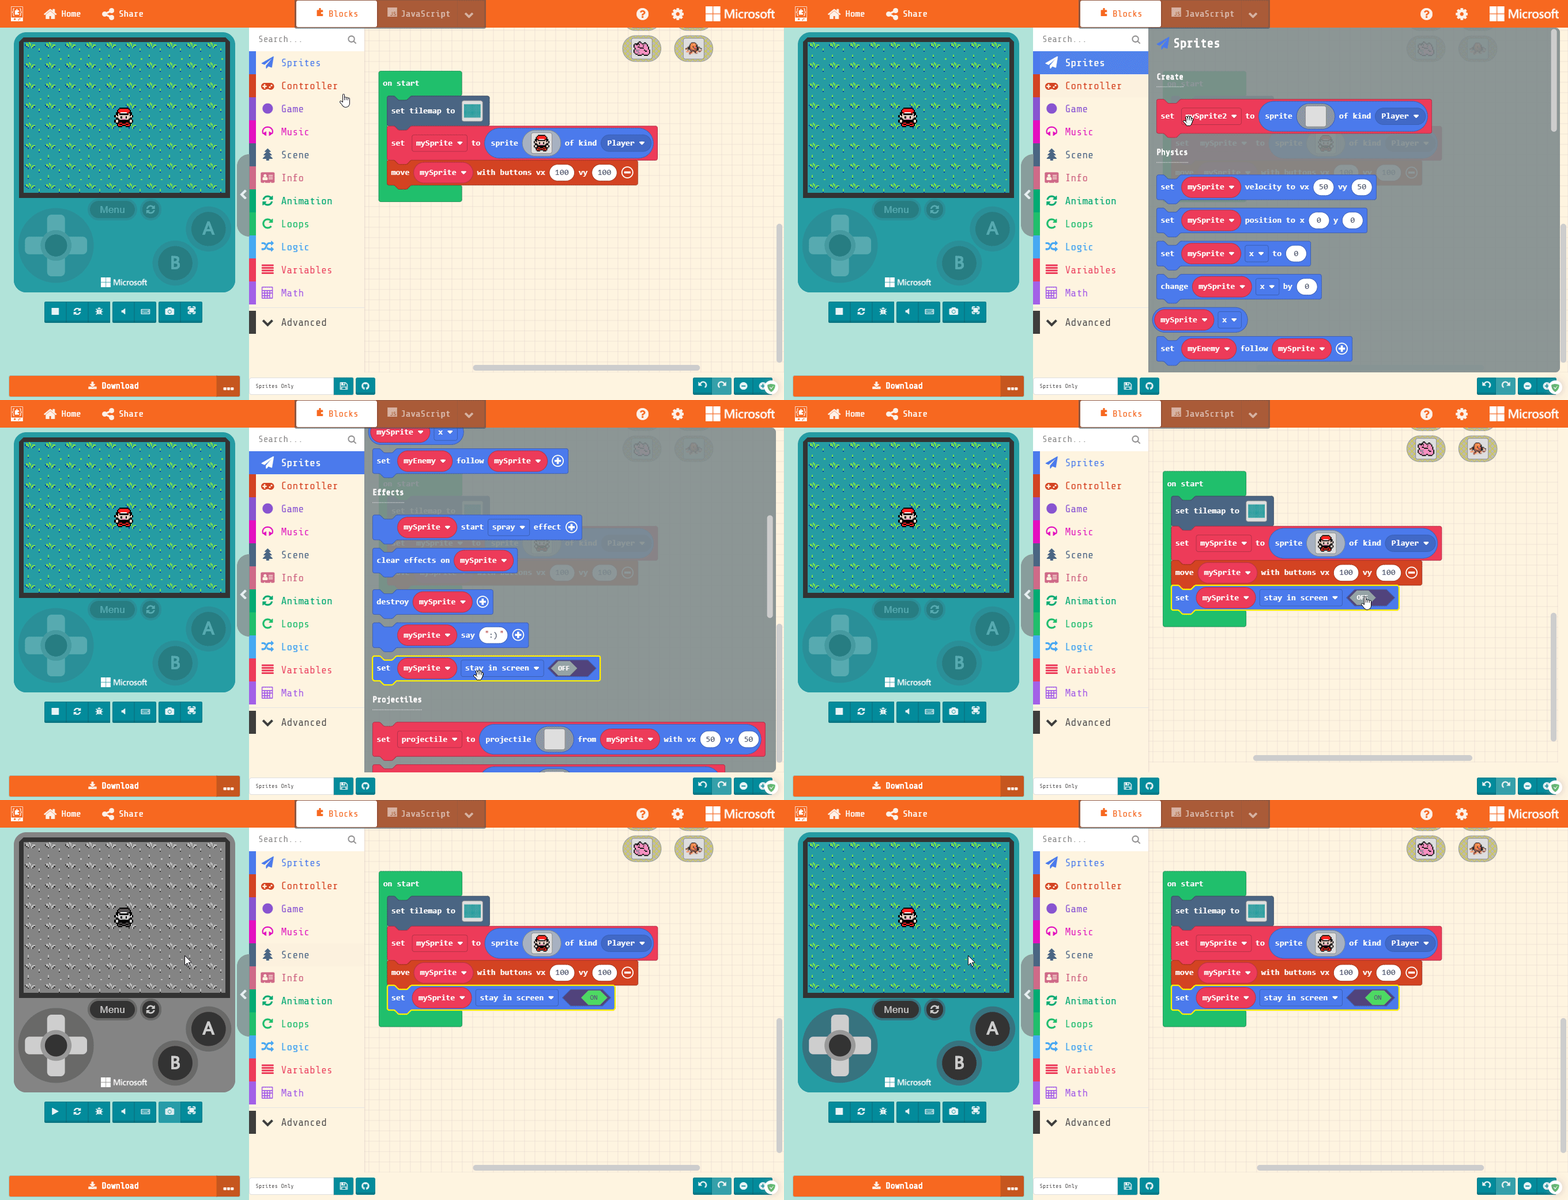
If the tilemap is larger than our screen, there’s a chance that any of our characters might end up off screen. To stop this from happening, we use the “set mySprite stay in screen” block from our Sprites section.
We have to make sure it’s ON though!
Giving Us Life
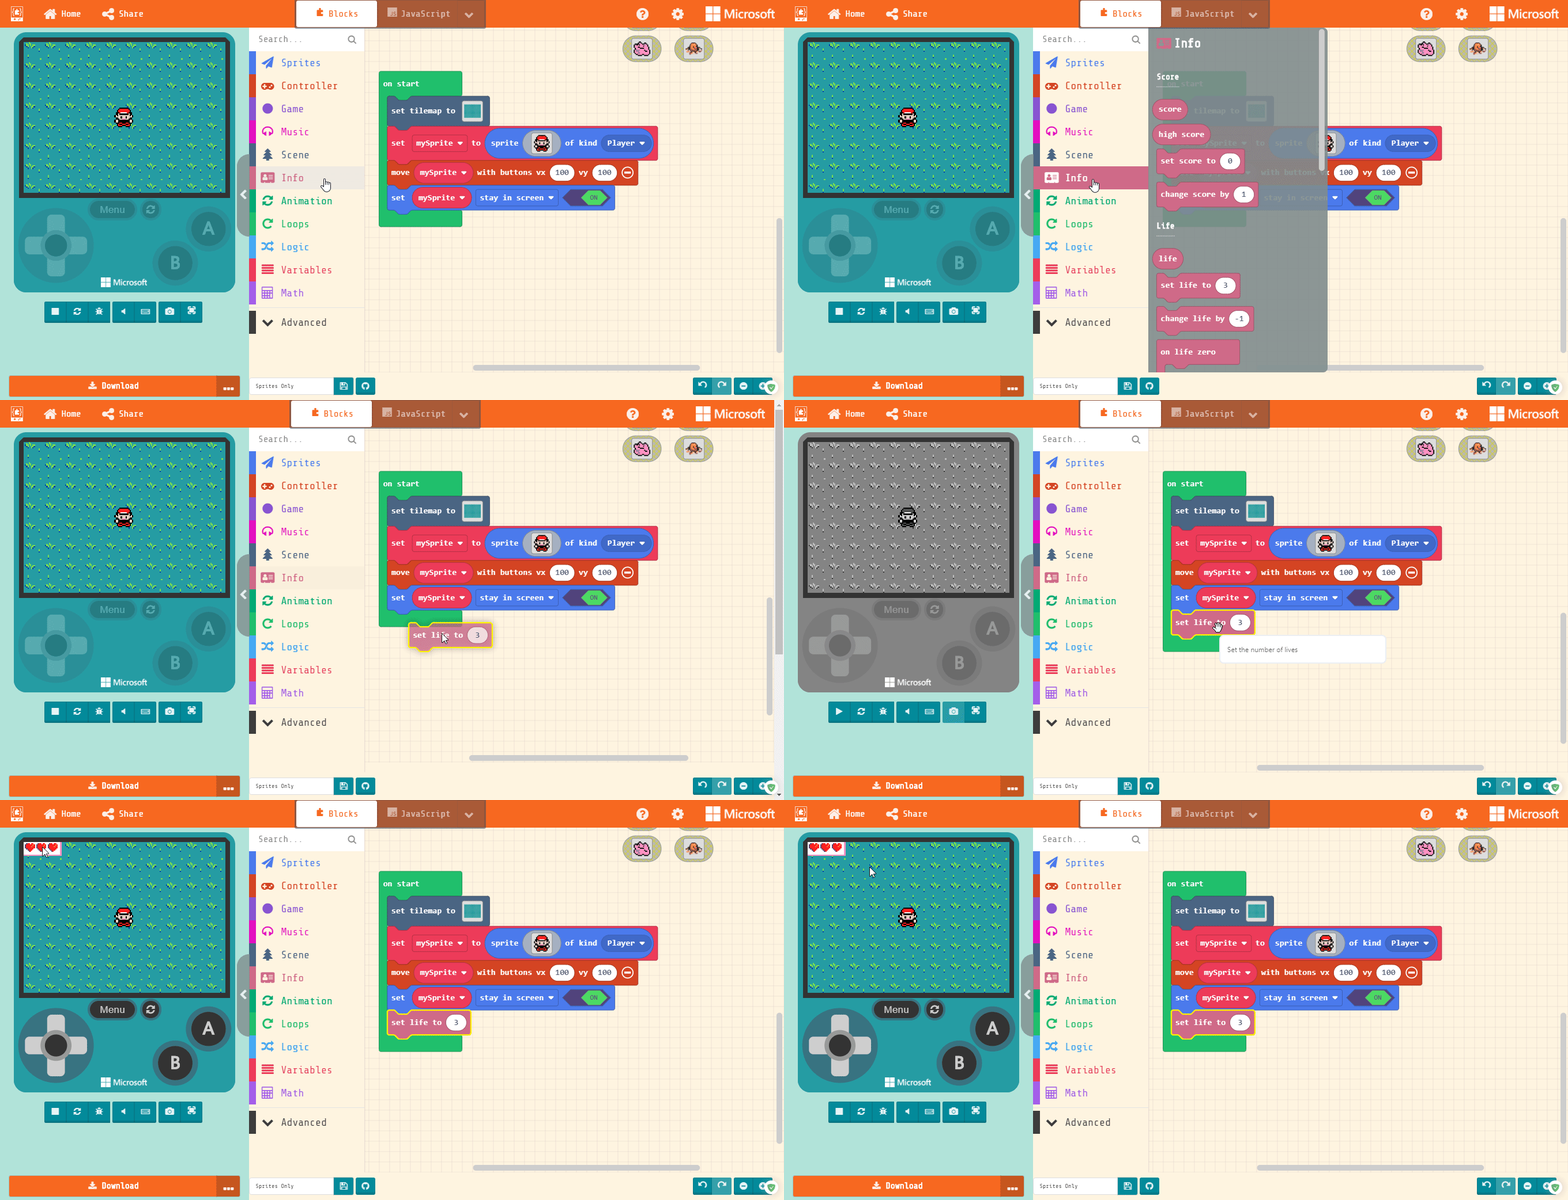
We have to have a way to lose, or it’s not really a game at all. We’re gonna start this by giving us a life bar.
Find the “set life to 3” block in the Info section and add it to our “on start” block. You should see 3 hearts pop up in the top-left corner of your game screen.
