Lesson 1: Adding Images
Just like Video Files, Image Files can be saved in a wide variety of formats. Each format has its pros and cons. For Video Editing, the most used Image Format is .PNG. These images usually do not come with any kind of Background to the image, which makes them perfect for adding onto our Video. Before we start adding in Images, let’s set up a folder to save them to. On your Desktop (or any other easily accessible location) create a new folder, called “Youtube Stuff“
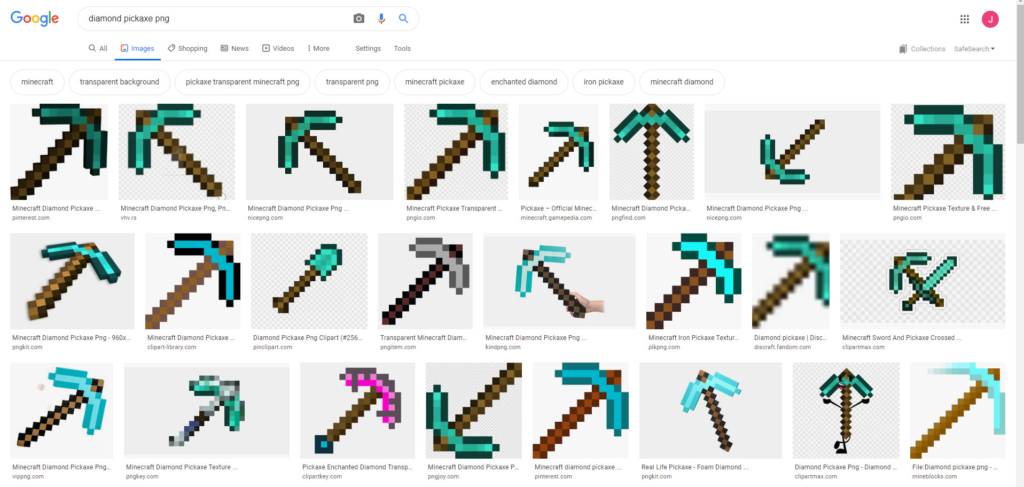
For this Example, we need to add a picture of a Diamond Pickaxe to our Minecraft Video. The first step will be to find an appropriate image. We searched for ‘Diamond Pickaxe png‘
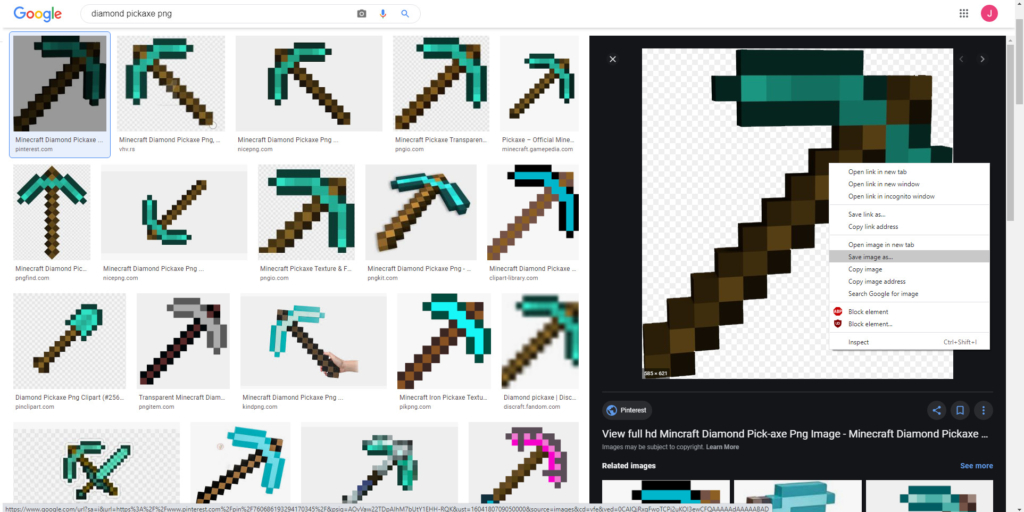
Click on an Image, and then Right Click on the enlarged version. Select “Save Image as“
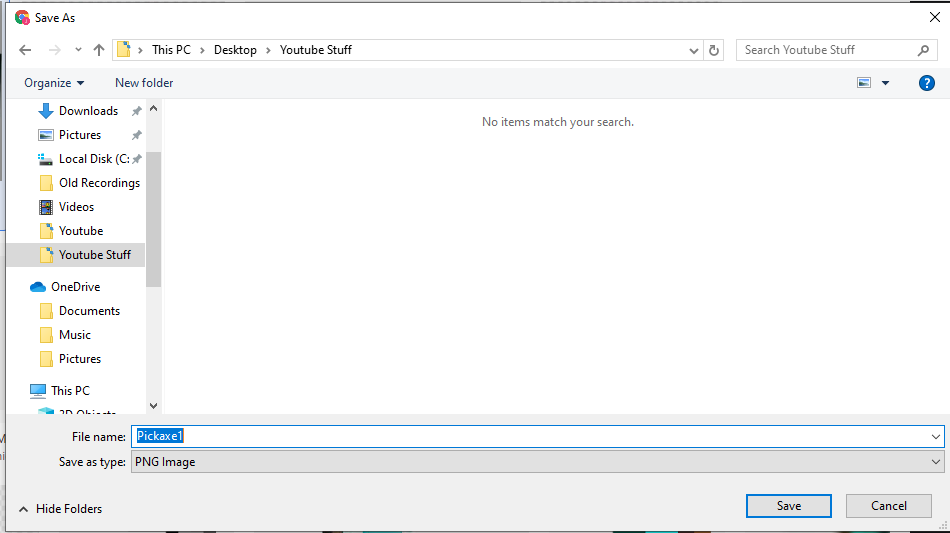
Save the image to the “Youtube Stuff” folder that we created earlier. Make sure that the ‘Save as Type‘ says PNG image
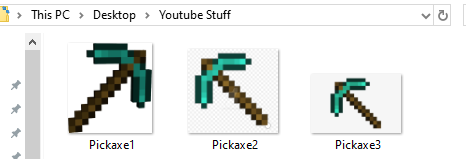
Often times, it will take multiple images to find one that works properly. For this example, we have gone ahead and saved 2 additional Pickaxe Pictures, for a total of 3
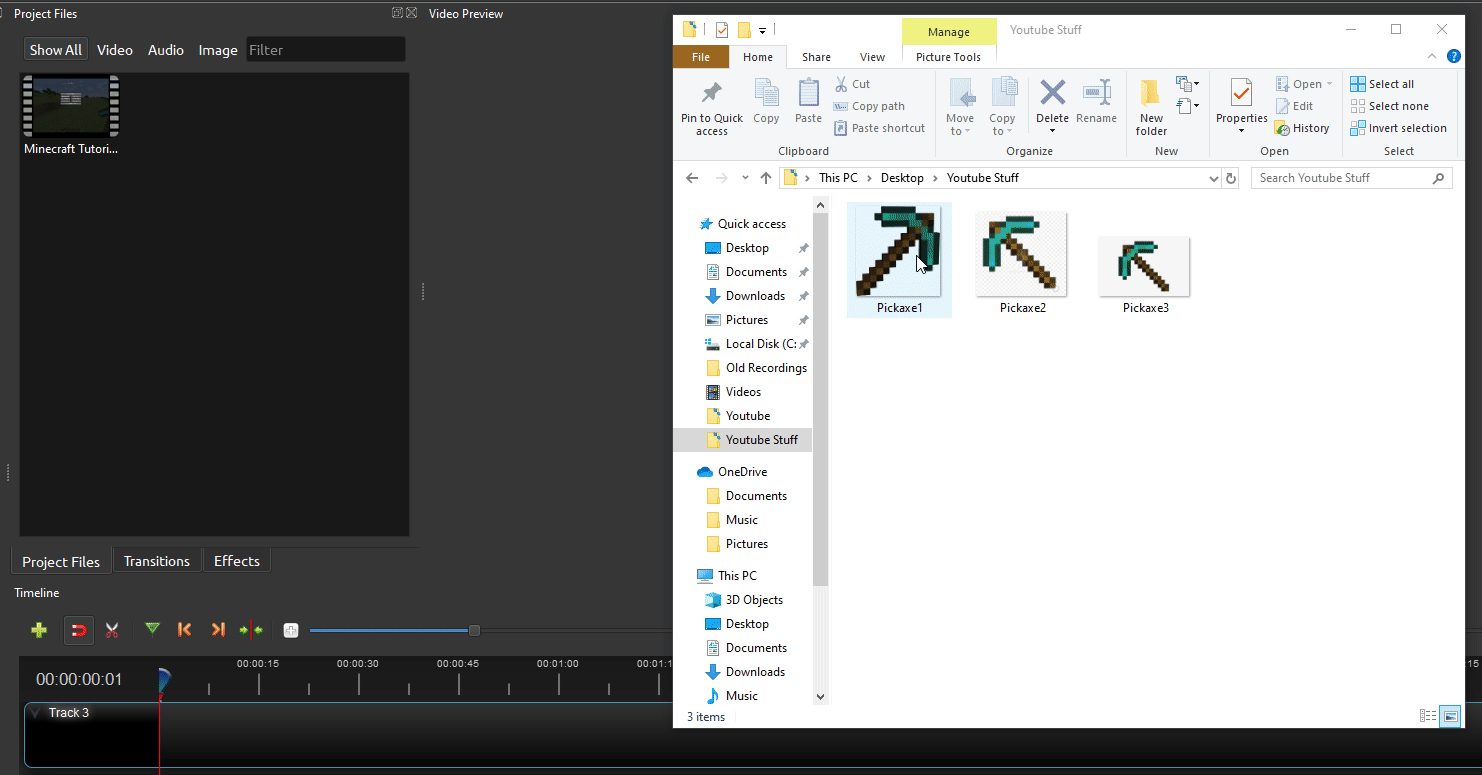
There are multiple ways to import these images, but the easiest way will be to Drag and Drop them into OpenShot, so that they appear inside of our Project Files. You may be prompted to import an Image as an Image Sequence, click No.
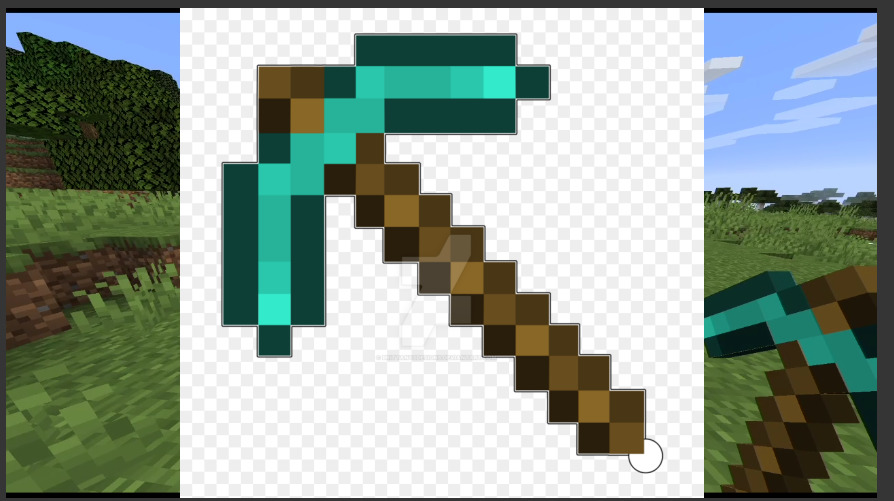
Right away we can see that two of the three images are unusable. The two pickaxes with White Backgrounds carry those backgrounds with them, which makes the image look out of place in our video
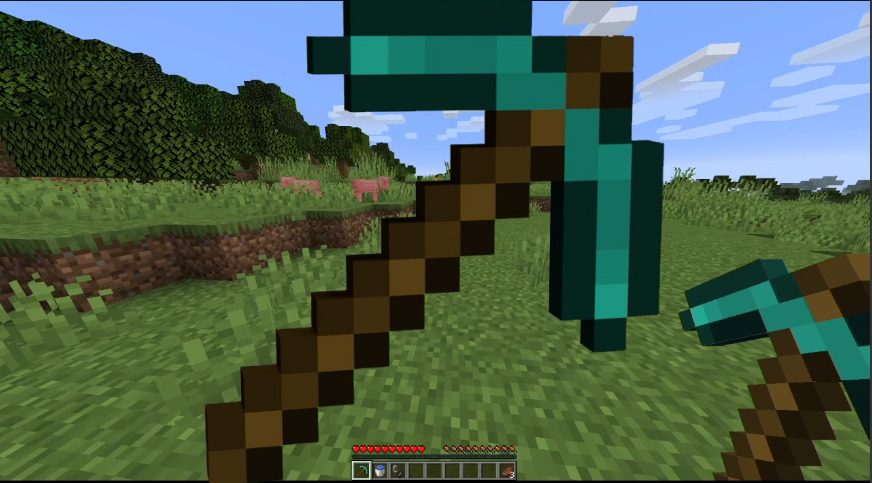
One of our Pickaxes has a black background, which is a good sign that the image will behave properly. When we add this pickaxe to our Timeline, we can see that it doesn’t cover our Video. Make sure to place the image on a track that is above the Video track, otherwise it won’t be visible