Lesson 2: Making a Nameplate
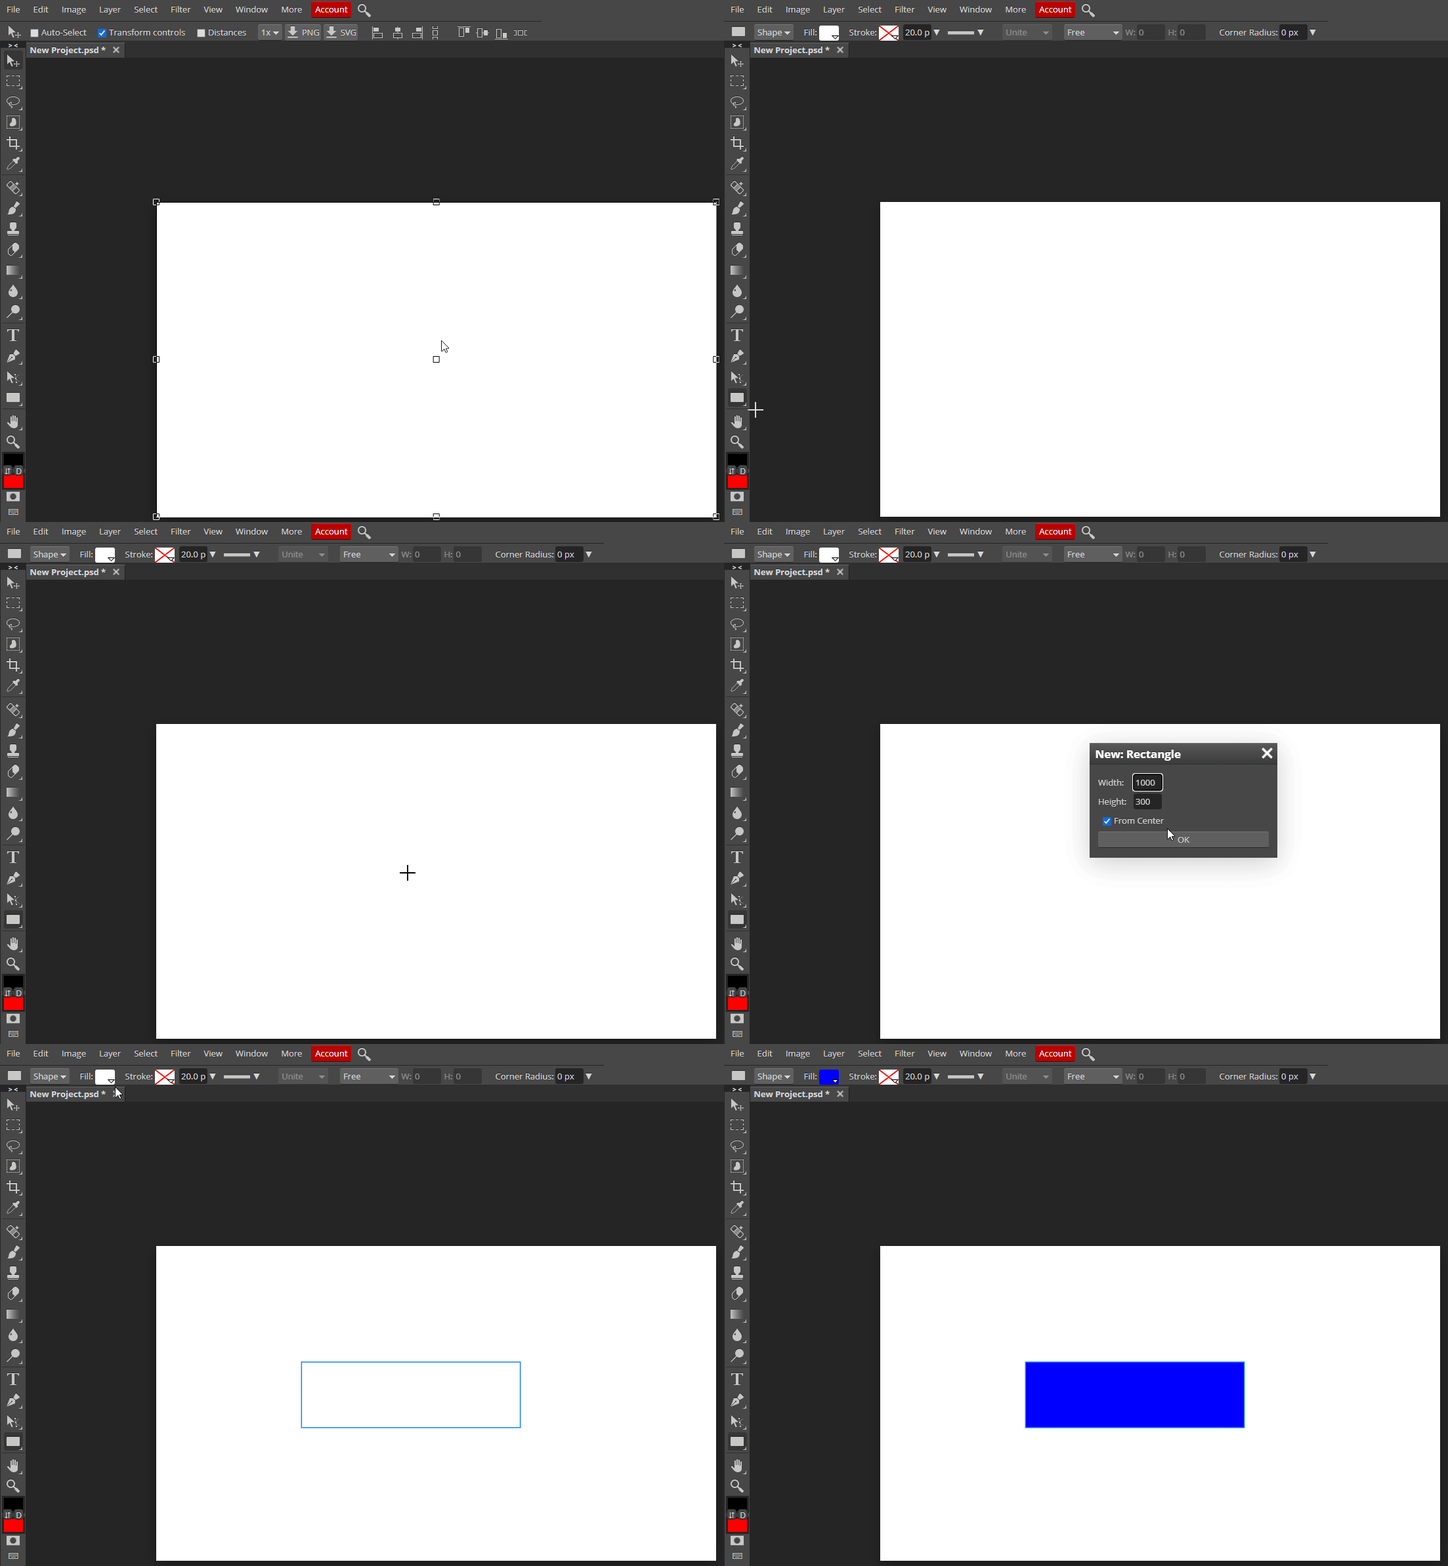
Our first step in creating a Nameplate will be to create a rectangle. We will start with a rectangle that is 1000×300, but depending on the name you choose, you may need to adjust the size.
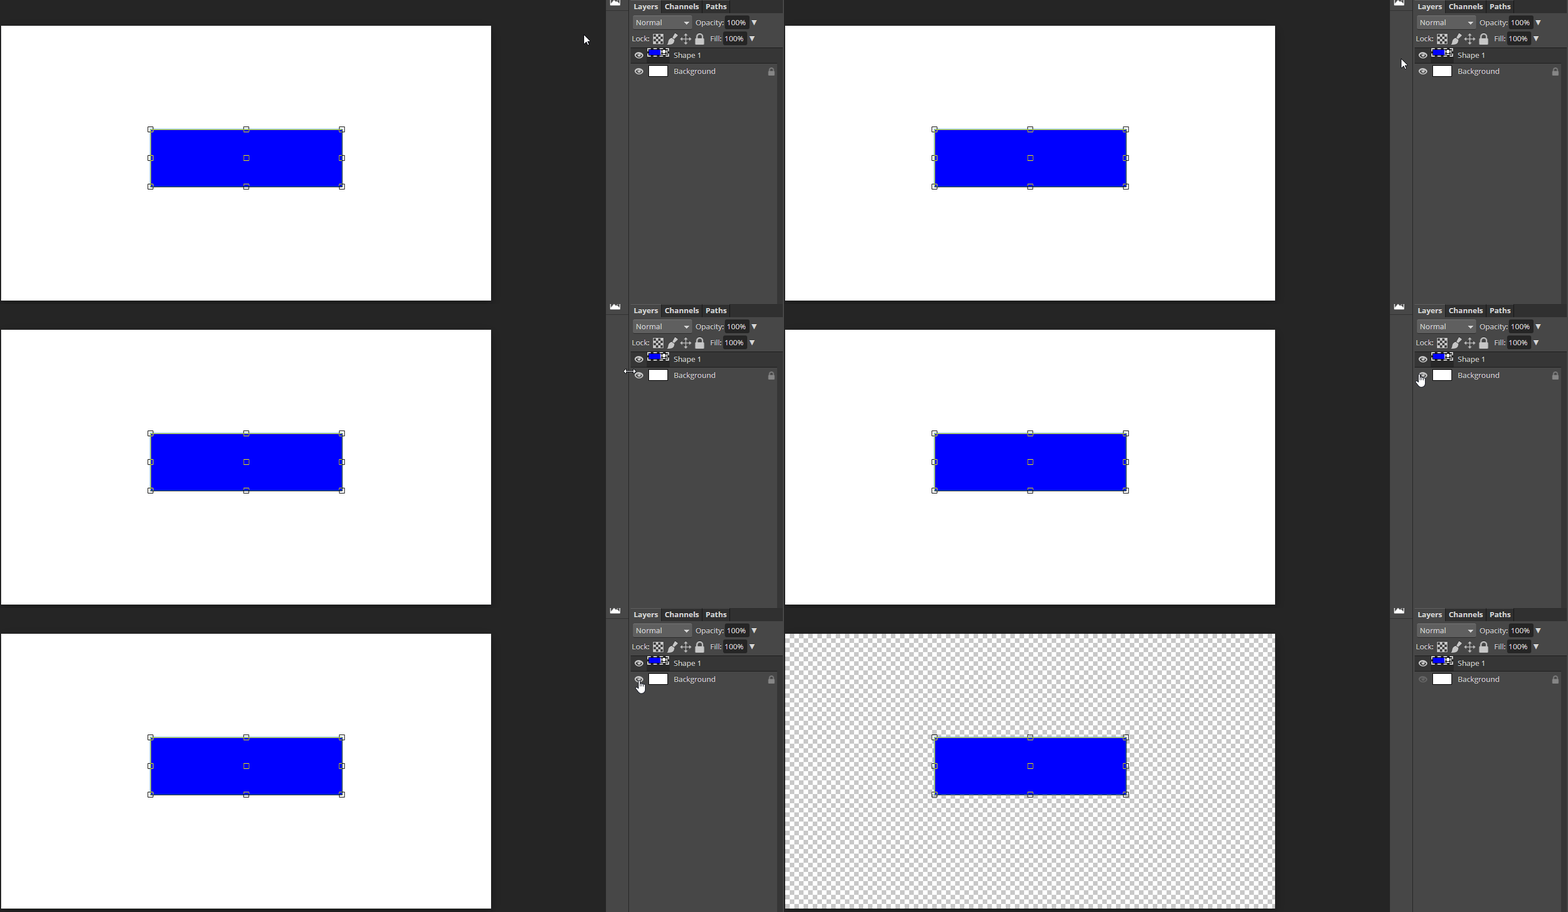
Before we go any further, we will want to ‘Hide’ our “Background” layer. If we left it visible, it would make it much harder for us to get a clear view of our project. Look for the Eyeball icon next to the “Background” layer
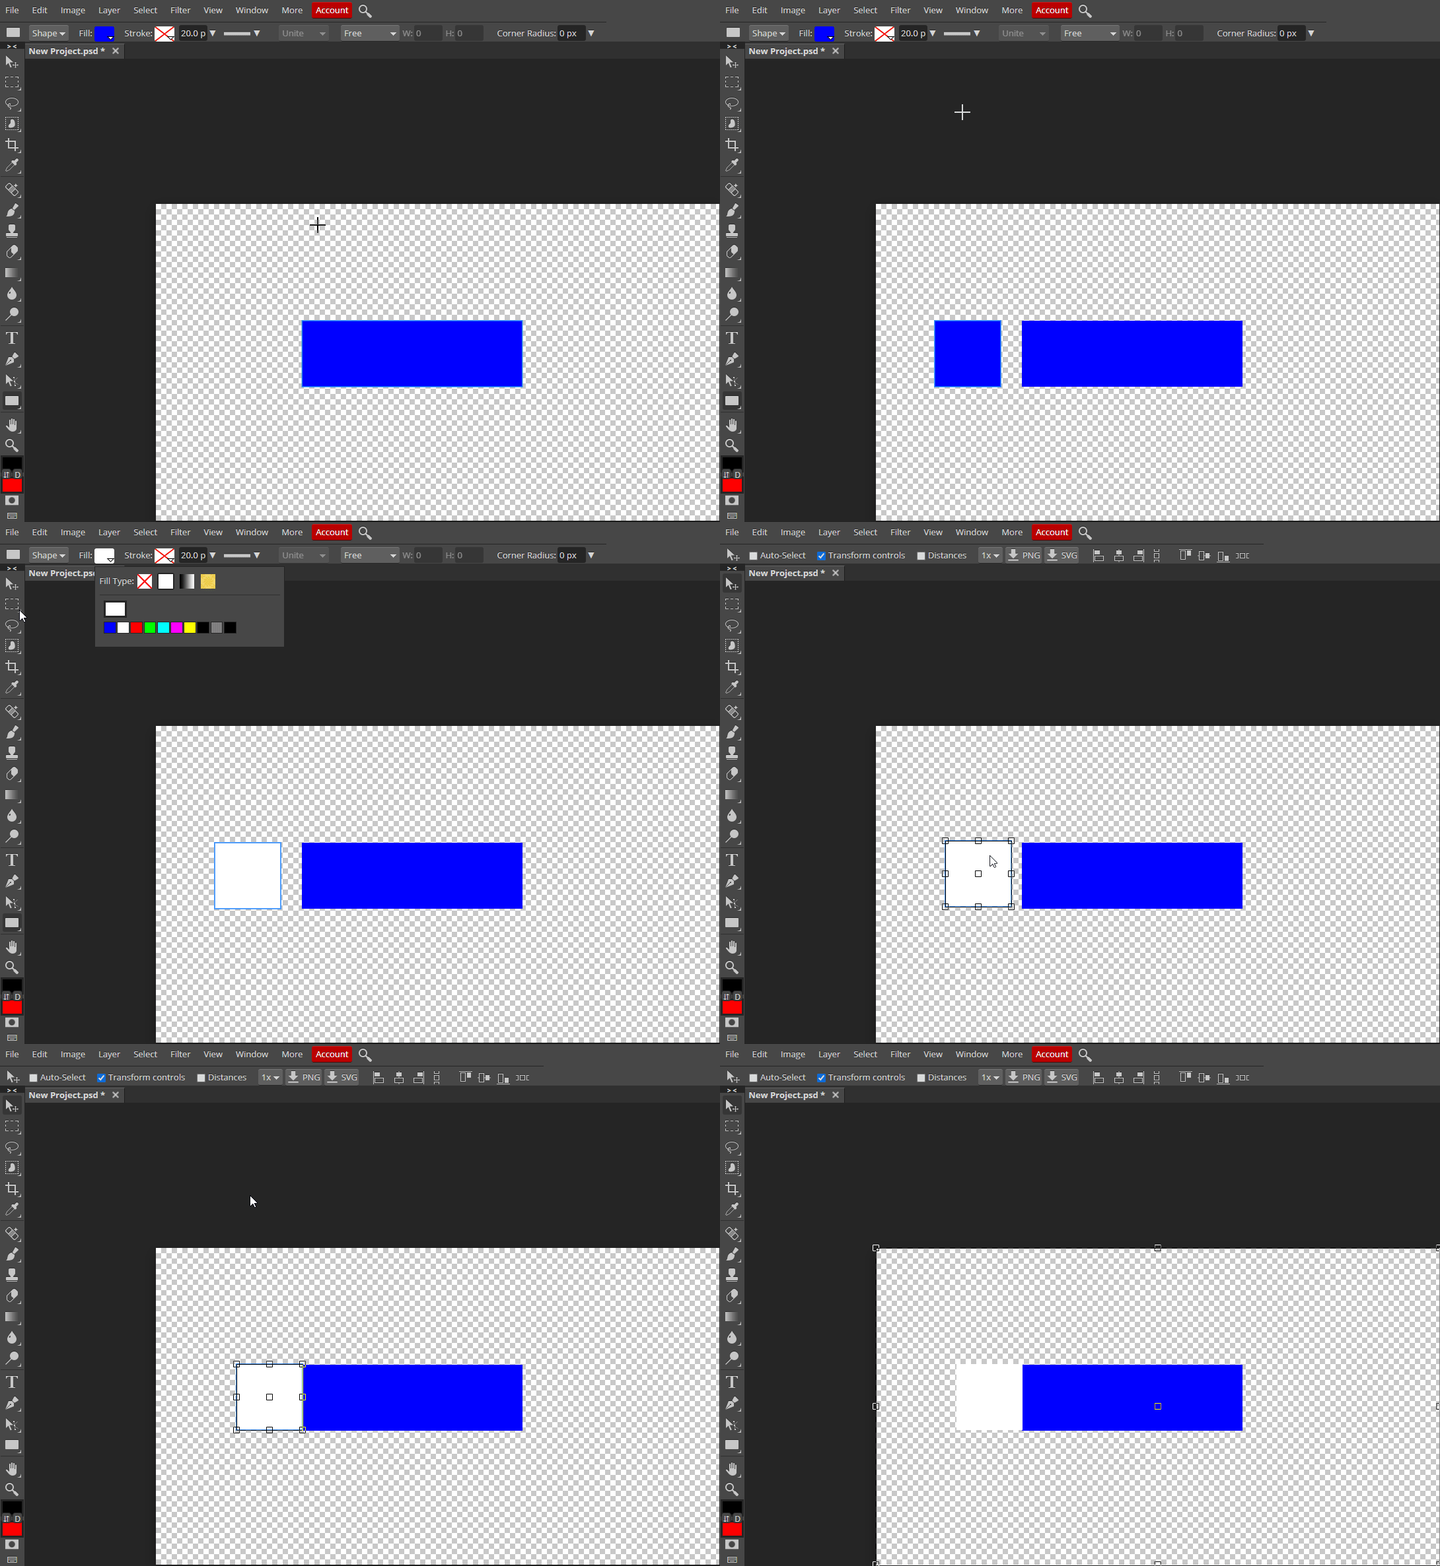
Next, add an additional rectangle. The dimensions should be 300×300, regardless of how long or short your name will be. Change the fill color to White.
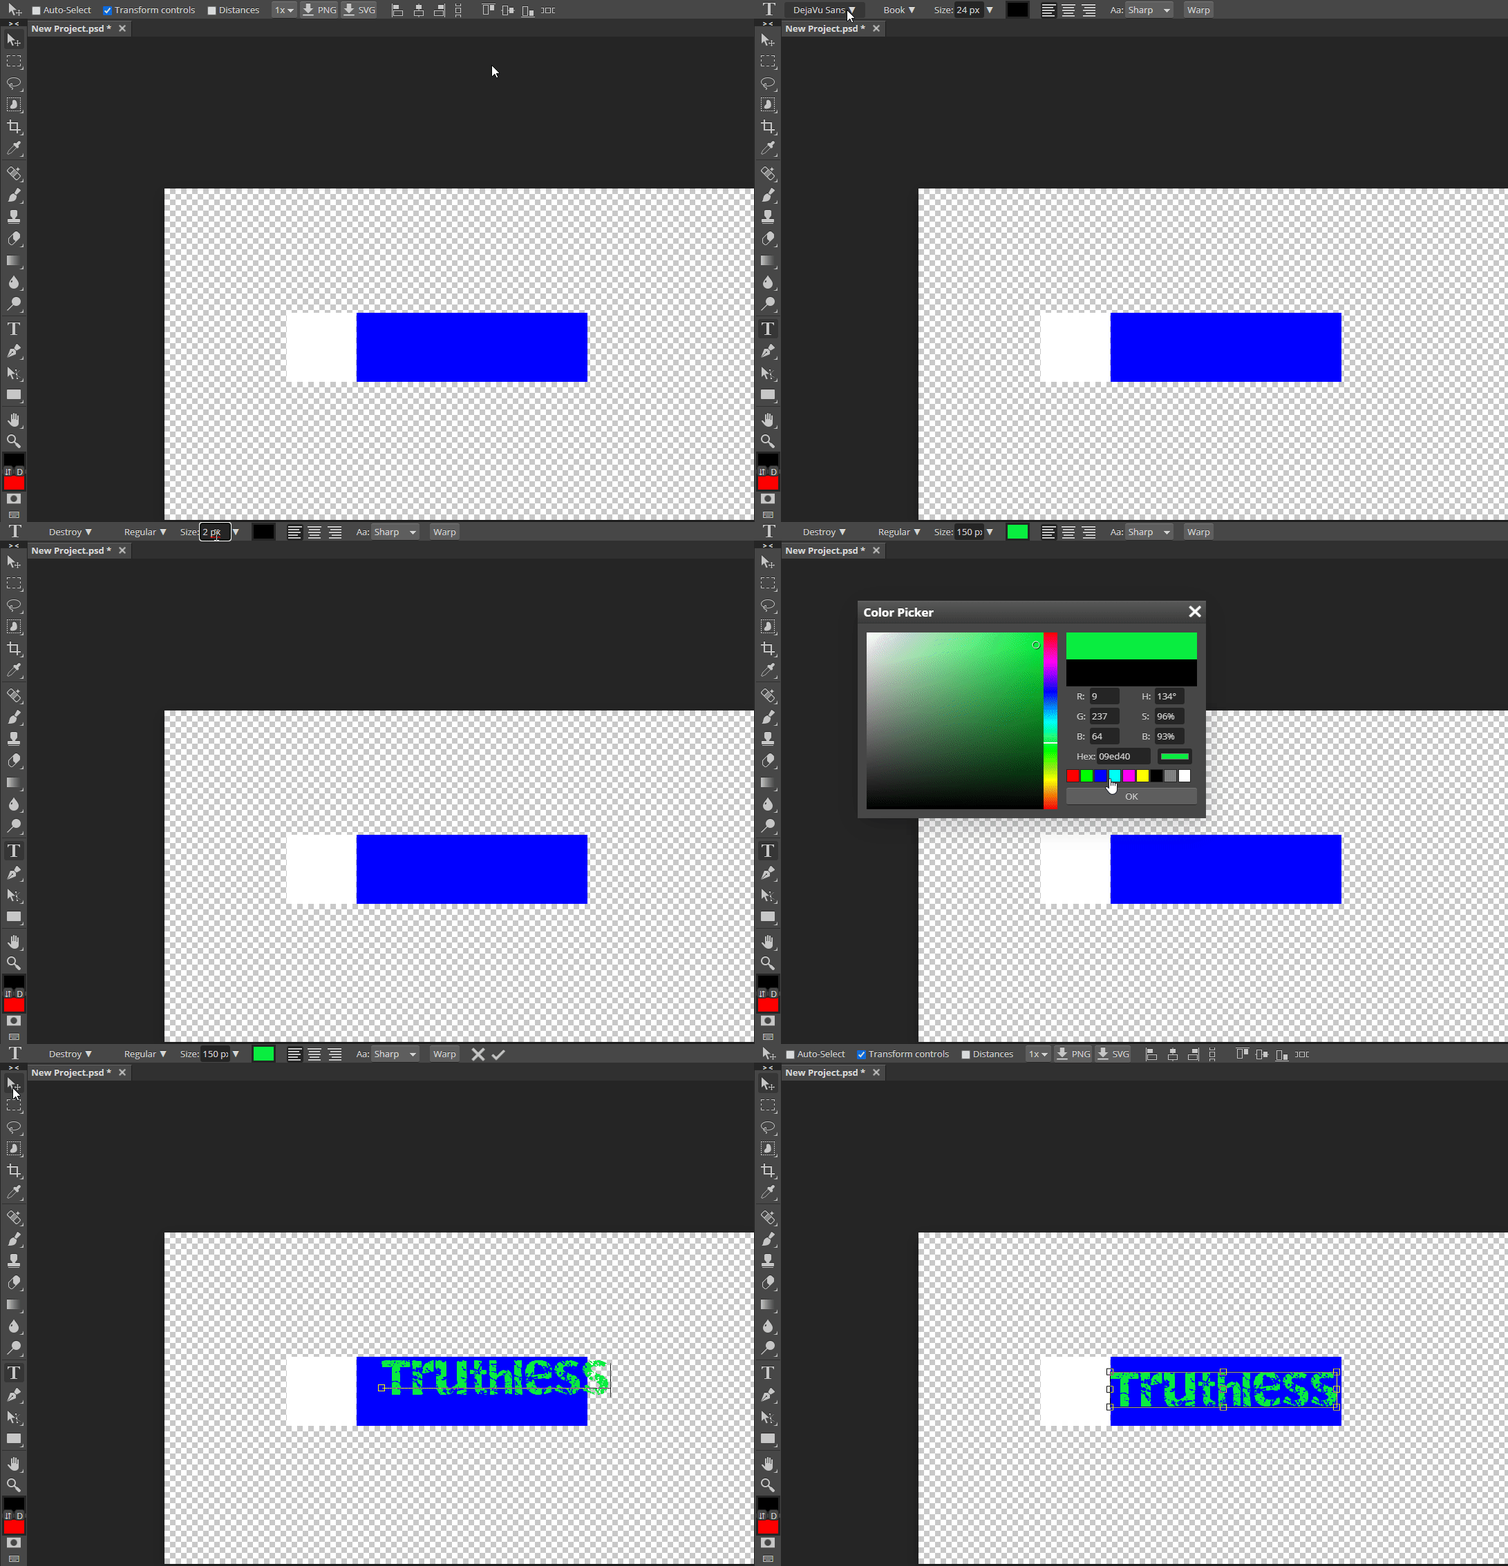
With the frame of our Nameplate set up, we can now add on the Text. Select the Text Tool, and then customize the font, size, and color. Once those have been selected, click inside of the rectangle to place our text. Adjust the position and size as needed.
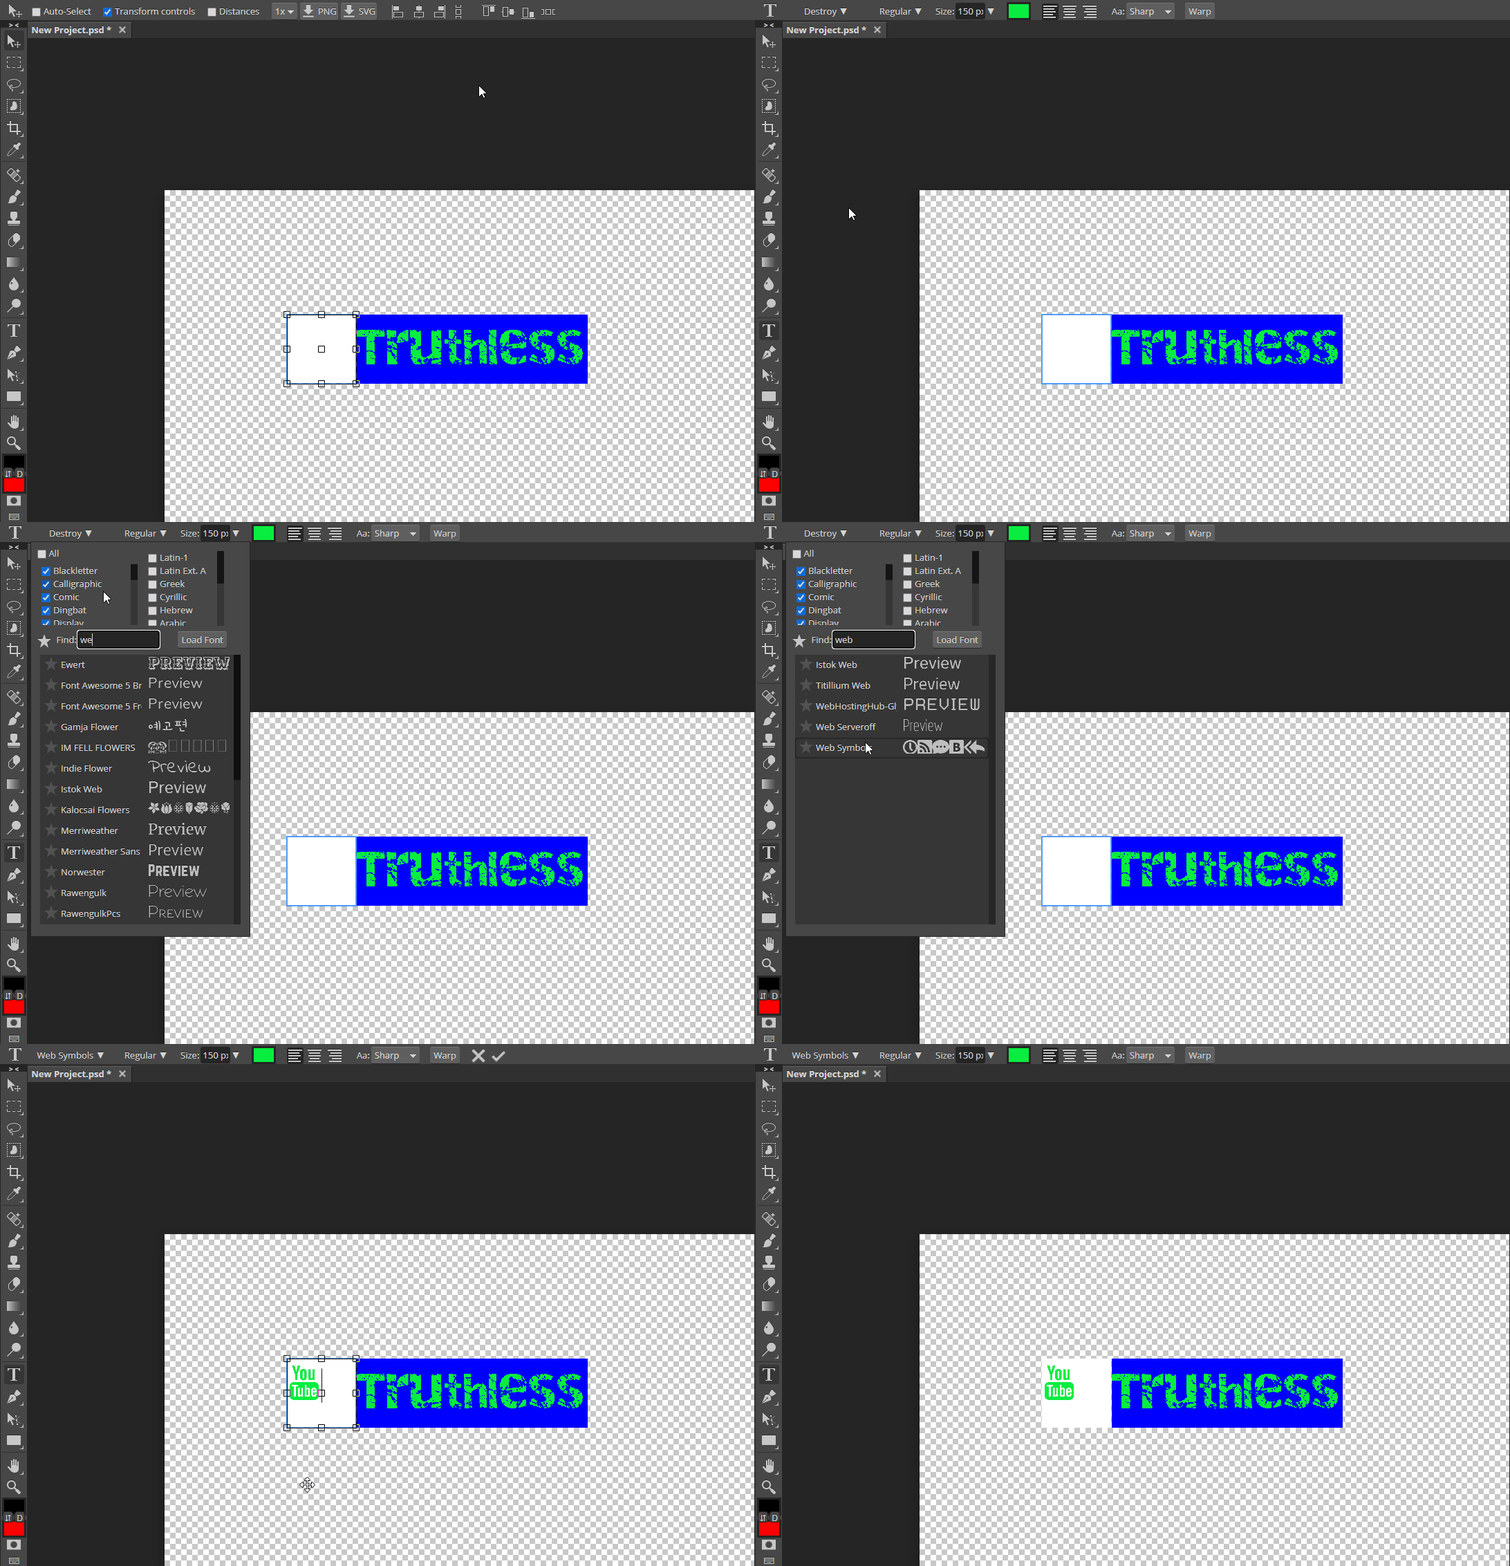
In the square next to our name, we will add in a symbol. In order to do this, we will use the Text tool again. This time, we will want to look for one of the “Symbol” fonts. These fonts change our letter inputs into differrent symbols. For example, if we go to the “WC Sold Out” Font, pressing the “n” key will add in a game controller symbol. The “Web Symbols” font also provides some useful ones. For example, the “y” key will give us a Youtube Symbol
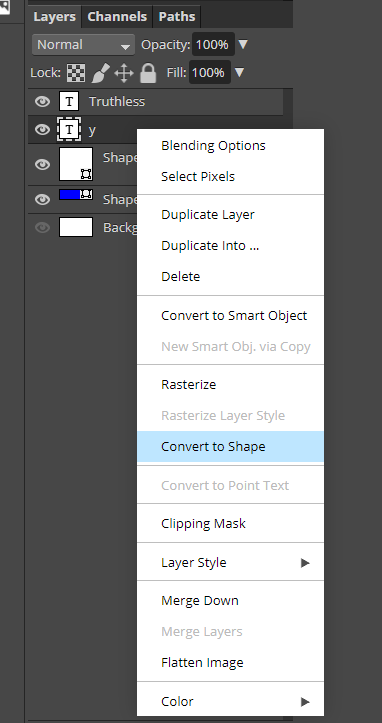
To resize the Youtube Symbol, we will first want to convert it from Text into a Shape. We do this by right-clicking on the layer, and selecting the option “Convert to Shape”
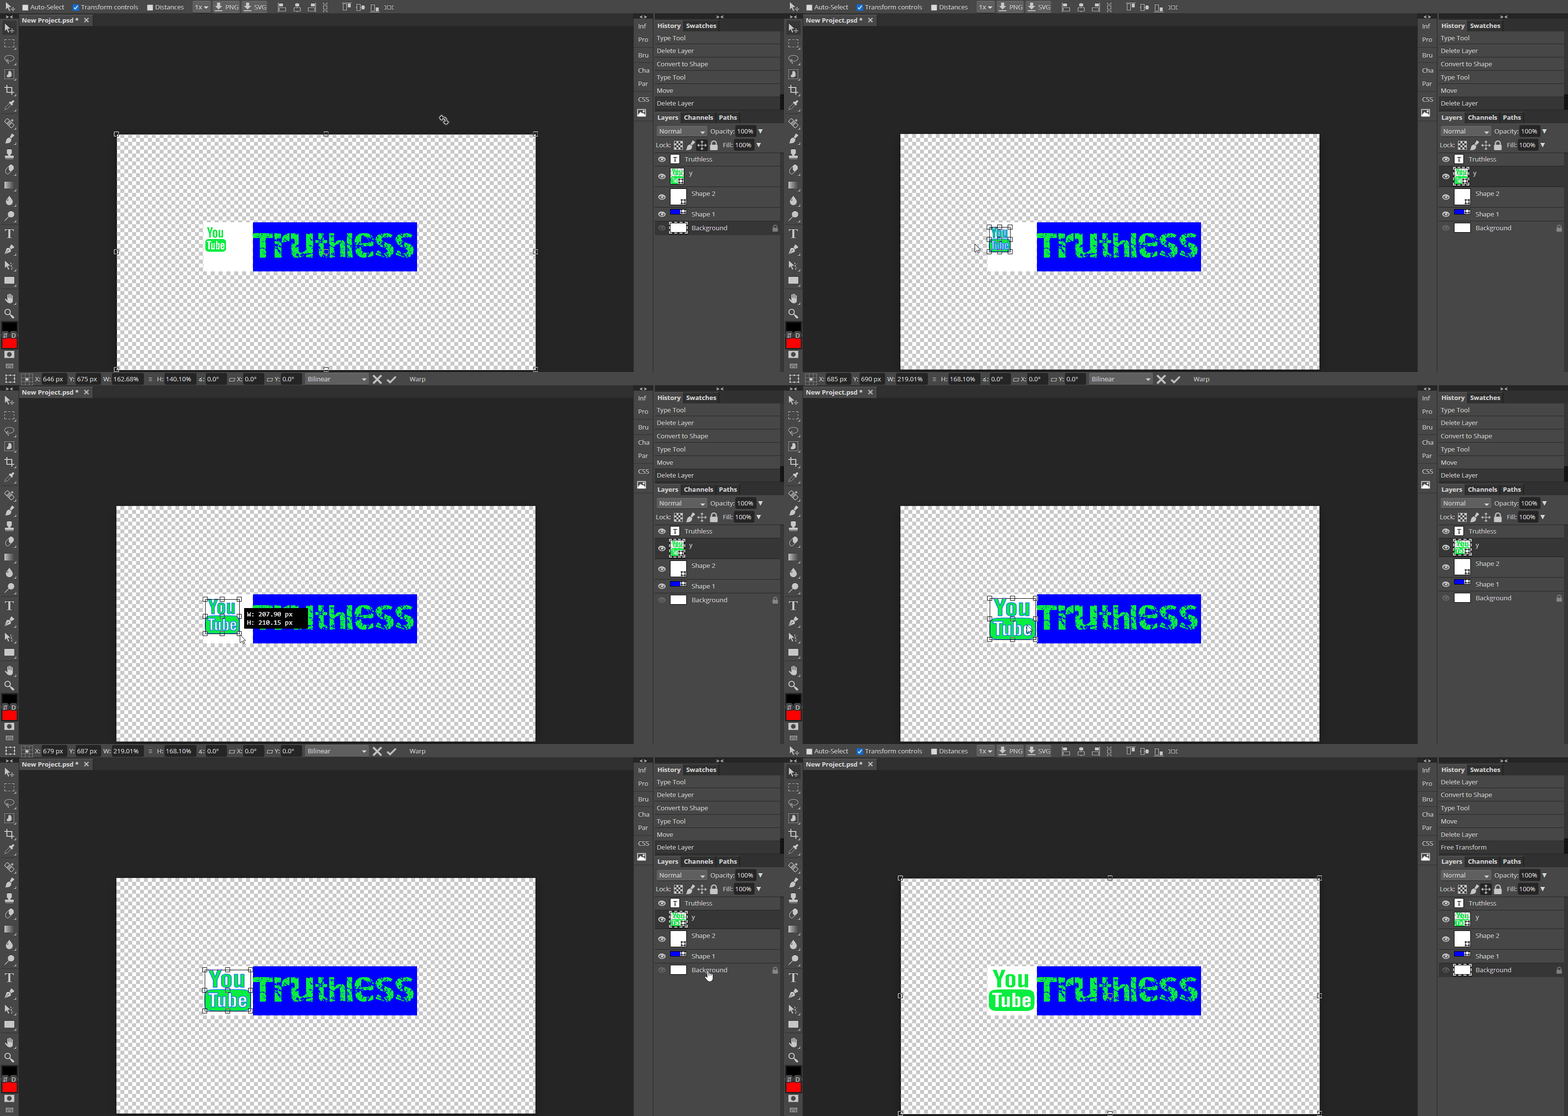
After converting the text to a shape, the object can be re-sized and moved appropiately
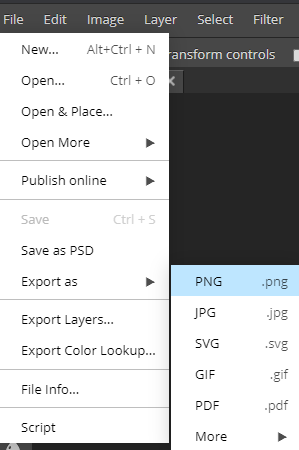
To export our finished Nameplate, go to “File” in the top left. Select “Export as”, and then” PNG”. Make sure to export the image to a memorable location.
