Step 4
Beginning our attack animations
Now let’s start adding some animations for when our character attacks.
We also want these to change depending on the direction the player is facing, which is where our facing variable comes in.
Let’s start with the right side. Add the code as shown to create an attack animation for the right side. There should already be some pre-existing sprites, but feel free to make your own!
For the attack animation, be sure it’s not set to loop and that its interval is 75 ms.
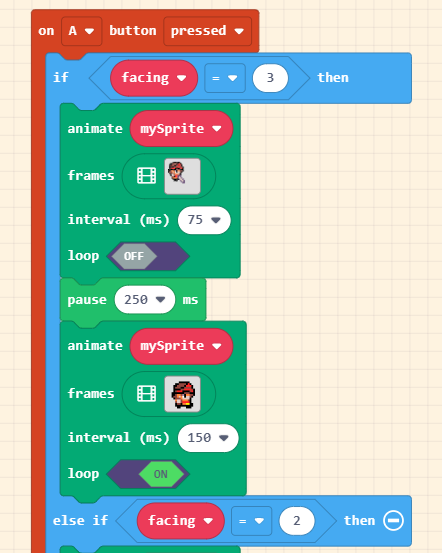
Down directional attack
Complete the code as shown here. It’s basically all the same, except be sure that we are checking to see if facing is 2, that we are currently facing down.
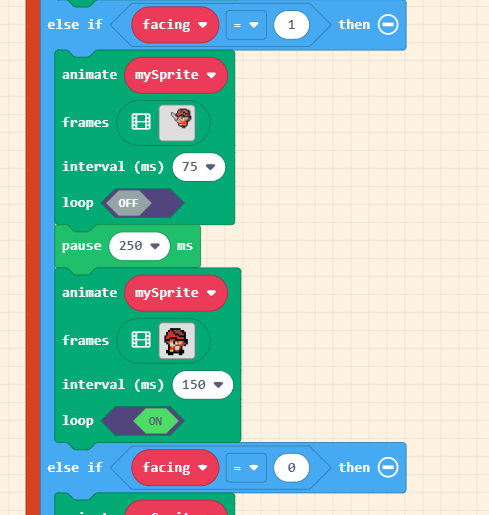
Also, you may be wondering why we have the pause block. This is so we give our attack animation time to finish before switching to the next animation.
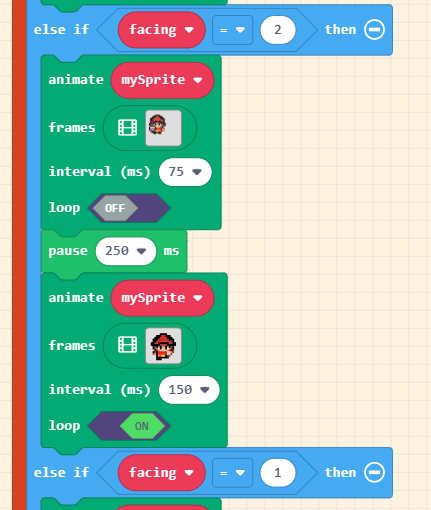
Left directional attack
Complete the code as shown here. Again, it’s basically all the same, except be sure that we are checking to see if facing is 1, that we are currently facing left.
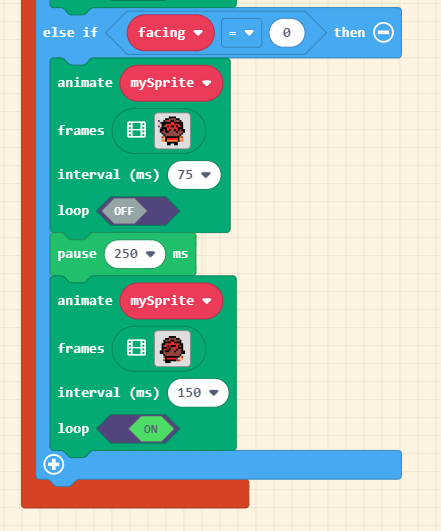
Up directional attack
Complete the code as shown here. Again, it’s basically all the same, except be sure that we are checking to see if facing is 0, that we are currently facing up.
Unfortunately, there is no pre-made animation for attacking in this direction. For this animation, modifying the walking animation in this direction is the easiest way to create a custom one.
Testing the animations
Now that we have all the code for our animations completed, let’s test it out.
If done correctly, we should now be able to attack in all four directions!